spynoodle
Active Member
How to Clone a Hard Drive
I just recently realized that my laptop's hard drive was going down the road to failure, so I had to clone all the data from the old drive onto a new drive from Newegg. Since I have all the steps fresh in my mind, I figured I'd write a guide on how to clone a hard drive.
Materials
For a desktop drive, you'll need:
-A CD-r drive, and a recordable CD
-An internet connection
-A new hard drive, to clone to. It should be larger or equal to the storage size of your old drive. You'll usually have to get a 3.5in. drive, but some Mini-ITX cases use 2.5in. drives.
-An IDE/SATA cable, depending on your type of drive. It is also possible to clone an IDE drive to a SATA drive, or vice versa.
For a laptop drive, you'll need:
-A CD-r drive, and a recordable CD
-An internet connection
-A new hard drive, to clone to. It should be larger or equal to the storage size of your old drive. Make sure to get either a 2.5in. or 1.8in. drive, depending on your laptop.
-A USB to IDE/SATA cable. Laptop SATA HDDs use the same kind of port as a desktop SATA HDD, but laptop IDE HDDs use a smaller kind of IDE port that has a built-in power plug, rather than the larger IDE+Molex combination on desktop HDDs. Usually, you can find a USB-SATA/IDE adapter on ebay by searching "USB SATA adapter" or "USB IDE adapter". If you're cloning to a laptop IDE drive, make sure that the adapter you find includes a laptop IDE plug.
Procedure
1. Download Clonezilla, Infrarecorder, and Partition Master. This guide was made with version 20100721-lucid of Clonezilla, so download that version from the "oldfiles" folder in the clonezilla_live_alternative folder. If you already have a program that burns CDs, then you don't need Infrarecorder. If you prefer to use a manufacturer-specific HDD cloning tool, then you do not need Clonezilla, and you may not need Partition Master. If you do decide to use a manufacturer-specific cloning tool, then you still may be able to use the following steps as guidelines for your program's specifiable options.
2. Insert a recordable CD in your CD-r drive.
3. Open up Infrarecorder, and press the button to "Write Image". This option allows you to write Clonezilla's ISO image file to a CD. It will open up an explorer window. Navigate to the folder that contains the Clonezilla ISO image that you downloaded, and open it. Then click "Ok". InfraRecorder will then burn Clonezilla to that CD. If you use another program to burn CDs, open that program and find the option to burn an ISO image. If your program doesn't have this option, then I suggest you download Infrarecorder. If you want Infrarecorder to easily be deleted when you are finished with it, then you may want to download the zip executable version.
4. When InfraRecorder is finished burning the CD, shut down your computer. Plug the new hard drive into the cable you're using for the cloning process.
5. Turn your computer back on, with the Clonezilla CD in your disk drive. If your system automatically boots to the CD, or prompts you to do so, then skip to step 6. If not, then:
a. Restart your PC and boot into your BIOS. To do this, you'll have to a hit a certain key at bootup, which varies depending on your PC's manufacturer. At bootup, most PCs show an image which will say which key to press. Press that key.
b. Navigate through your BIOS, and find the setting which determines the boot order. Switch the first boot item to your CD drive, then exit the BIOS, saving your changes.
6. Clonezilla will then start up, looking something like this:
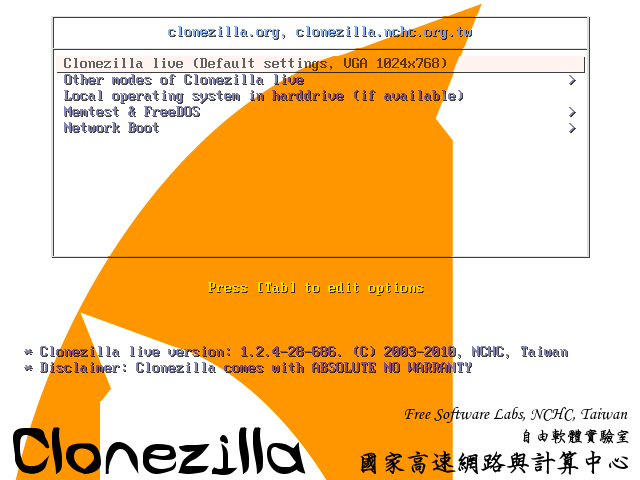
Hit Enter to run at default settings.
7. You will then be asked which language to run in. If you're reading this, you'll probably want English.")
8. Next, you'll be asked about the Keymap. If you are using a U.S. keyboard, select "Don't Touch Keymap", or just hit Enter. If you are using a different type of keyboard, choose "Select keymap from arch list".
9. Clonezilla will then ask you if you want to run in normal or shell mode. If you select shell mode, then Clonezilla will run from a command prompt. For a graphical interface, select normal mode.
10. Next, you'll have to select which form of cloning to do, device-image or device-device. Select device-device, since you are cloning directly from one drive to another.
11. Then, you will be asked which mode to run in: beginner or expert. Select beginner if you want to do a basic clone. If you think you may want to set special options, such as the cloning and installation of boot manager options, then select expert. Also, if you've had problems cloning, then you may want to tweak some of Clonezilla's settings by going into expert mode. To change any of the parameters in expert mode, highlight the parameter you want to change and press [spacebar]. If you select expert mode and don't want to change any settings, then press Enter at each selection screen to continue with default settings.
12. Now you'll be asked what kind of cloning you want to perform, which will involve local and remote disks. Since you are working with disks plugged into your computer directly, press Enter to continue.
13. Now, you'll have to choose which disk to clone from, and then which disk to clone to. Choose appropriately.
14. You will then be warned two times that the target disk will be overwritten if you clone to it. Type "y" and hit Enter both times. You will also be asked if you want to clone the MBR from the original disk. Once again, just type "y" and hit Enter. Your disk will now clone over. When it is done, you will be given prompts on how to shut down Clonezilla. Follow these prompts. The Clonezilla CD will be ejected , and you will be prompted to hit Enter to turn off your computer.
15. After your system shuts down, take out your old hard drive and replace it with the new one. This process will vary, especially with laptops.
16. Turn your computer back on. Then run Partition Master. If your new hard disk has more space than your old one, then you'll see that you're not utilizing all the extra space. Resize the disk's partition accordingly.
17. Defragment your drive. This is optional, but it will improve your computer's speed. I prefer to defragment using Defraggler, although there is also a Windows defragmentation utility.
Congratz, you've just cloned your hard drive. You now probably have more space, and if you cloned because your hard drive was dying, then you no longer have to deal with a feeling of impending doom.
Tiny FAQ
Q. A random vague IO error came up during the cloning process. What does this mean?
A. This means that the hard disk you are cloning from has one or more bad sectors. This is a sign of soon-to-come HDD failure, so it's a good thing that you're cloning. If you use Windows, then boot into it and type WindowsKey+R. Then type "cmd". This will bring you into a command line. Type "chkdsk /f". Type "y" and then Enter. Upon reboot, Windows will reallocate any files on your bad sector(s).
Q. I'm not sure if my drive is going bad. How can I find out?
A. Many hard drive manufacturers make their own utilities to find and reallocate bad sectors. For example, Seagate makes Seatools, and Western Digital makes Data Lifeguard Diagnostic. For a universal tool, you can download HDtune. If any of these tools report bad sectors, then it's time to clone. Some tools, such as HDtune, lack the feature to reallocate the bad sectors that they detect. In this scenario, you must also go through the chdsk process as explained above. If bad sectors are not reallocated, then you may receive an IO error during the cloning process. Also note that HDtune will often miss bad sectors when set to run a quick scan.
Q. I ran into a problem cloning a SATA drive to a PATA drive. What should I do?
A. According to 2048Megabytes, you may run into problems cloning a SATA drive to a PATA drive:
*Important Note Regarding SSDs*
Cloning from a standard mechanical hard disk drive to an SSD is not recommended. When Windows is installed on an SSD versus an HDD, certain SSD-specific features such as TRIM are enabled. These features are necessary for the proper long-term operation of many SSDs. For this reason, it is recommended to do a clean install of Windows on an SSD.
If cloning from an HDD to an SSD is absolutely necessary, I recommend following this guide:
http://www.howtogeek.com/97242/how-to-migrate-windows-7-to-a-solid-state-drive/
I just recently realized that my laptop's hard drive was going down the road to failure, so I had to clone all the data from the old drive onto a new drive from Newegg. Since I have all the steps fresh in my mind, I figured I'd write a guide on how to clone a hard drive.
Materials
For a desktop drive, you'll need:
-A CD-r drive, and a recordable CD
-An internet connection
-A new hard drive, to clone to. It should be larger or equal to the storage size of your old drive. You'll usually have to get a 3.5in. drive, but some Mini-ITX cases use 2.5in. drives.
-An IDE/SATA cable, depending on your type of drive. It is also possible to clone an IDE drive to a SATA drive, or vice versa.
For a laptop drive, you'll need:
-A CD-r drive, and a recordable CD
-An internet connection
-A new hard drive, to clone to. It should be larger or equal to the storage size of your old drive. Make sure to get either a 2.5in. or 1.8in. drive, depending on your laptop.
-A USB to IDE/SATA cable. Laptop SATA HDDs use the same kind of port as a desktop SATA HDD, but laptop IDE HDDs use a smaller kind of IDE port that has a built-in power plug, rather than the larger IDE+Molex combination on desktop HDDs. Usually, you can find a USB-SATA/IDE adapter on ebay by searching "USB SATA adapter" or "USB IDE adapter". If you're cloning to a laptop IDE drive, make sure that the adapter you find includes a laptop IDE plug.
Procedure
1. Download Clonezilla, Infrarecorder, and Partition Master. This guide was made with version 20100721-lucid of Clonezilla, so download that version from the "oldfiles" folder in the clonezilla_live_alternative folder. If you already have a program that burns CDs, then you don't need Infrarecorder. If you prefer to use a manufacturer-specific HDD cloning tool, then you do not need Clonezilla, and you may not need Partition Master. If you do decide to use a manufacturer-specific cloning tool, then you still may be able to use the following steps as guidelines for your program's specifiable options.
2. Insert a recordable CD in your CD-r drive.
3. Open up Infrarecorder, and press the button to "Write Image". This option allows you to write Clonezilla's ISO image file to a CD. It will open up an explorer window. Navigate to the folder that contains the Clonezilla ISO image that you downloaded, and open it. Then click "Ok". InfraRecorder will then burn Clonezilla to that CD. If you use another program to burn CDs, open that program and find the option to burn an ISO image. If your program doesn't have this option, then I suggest you download Infrarecorder. If you want Infrarecorder to easily be deleted when you are finished with it, then you may want to download the zip executable version.
4. When InfraRecorder is finished burning the CD, shut down your computer. Plug the new hard drive into the cable you're using for the cloning process.
5. Turn your computer back on, with the Clonezilla CD in your disk drive. If your system automatically boots to the CD, or prompts you to do so, then skip to step 6. If not, then:
a. Restart your PC and boot into your BIOS. To do this, you'll have to a hit a certain key at bootup, which varies depending on your PC's manufacturer. At bootup, most PCs show an image which will say which key to press. Press that key.
b. Navigate through your BIOS, and find the setting which determines the boot order. Switch the first boot item to your CD drive, then exit the BIOS, saving your changes.
6. Clonezilla will then start up, looking something like this:
Hit Enter to run at default settings.
7. You will then be asked which language to run in. If you're reading this, you'll probably want English.
8. Next, you'll be asked about the Keymap. If you are using a U.S. keyboard, select "Don't Touch Keymap", or just hit Enter. If you are using a different type of keyboard, choose "Select keymap from arch list".
9. Clonezilla will then ask you if you want to run in normal or shell mode. If you select shell mode, then Clonezilla will run from a command prompt. For a graphical interface, select normal mode.
10. Next, you'll have to select which form of cloning to do, device-image or device-device. Select device-device, since you are cloning directly from one drive to another.
11. Then, you will be asked which mode to run in: beginner or expert. Select beginner if you want to do a basic clone. If you think you may want to set special options, such as the cloning and installation of boot manager options, then select expert. Also, if you've had problems cloning, then you may want to tweak some of Clonezilla's settings by going into expert mode. To change any of the parameters in expert mode, highlight the parameter you want to change and press [spacebar]. If you select expert mode and don't want to change any settings, then press Enter at each selection screen to continue with default settings.
12. Now you'll be asked what kind of cloning you want to perform, which will involve local and remote disks. Since you are working with disks plugged into your computer directly, press Enter to continue.
13. Now, you'll have to choose which disk to clone from, and then which disk to clone to. Choose appropriately.
14. You will then be warned two times that the target disk will be overwritten if you clone to it. Type "y" and hit Enter both times. You will also be asked if you want to clone the MBR from the original disk. Once again, just type "y" and hit Enter. Your disk will now clone over. When it is done, you will be given prompts on how to shut down Clonezilla. Follow these prompts. The Clonezilla CD will be ejected , and you will be prompted to hit Enter to turn off your computer.
15. After your system shuts down, take out your old hard drive and replace it with the new one. This process will vary, especially with laptops.
16. Turn your computer back on. Then run Partition Master. If your new hard disk has more space than your old one, then you'll see that you're not utilizing all the extra space. Resize the disk's partition accordingly.
17. Defragment your drive. This is optional, but it will improve your computer's speed. I prefer to defragment using Defraggler, although there is also a Windows defragmentation utility.
Congratz, you've just cloned your hard drive. You now probably have more space, and if you cloned because your hard drive was dying, then you no longer have to deal with a feeling of impending doom.
Tiny FAQ
Q. A random vague IO error came up during the cloning process. What does this mean?
A. This means that the hard disk you are cloning from has one or more bad sectors. This is a sign of soon-to-come HDD failure, so it's a good thing that you're cloning. If you use Windows, then boot into it and type WindowsKey+R. Then type "cmd". This will bring you into a command line. Type "chkdsk /f". Type "y" and then Enter. Upon reboot, Windows will reallocate any files on your bad sector(s).
Q. I'm not sure if my drive is going bad. How can I find out?
A. Many hard drive manufacturers make their own utilities to find and reallocate bad sectors. For example, Seagate makes Seatools, and Western Digital makes Data Lifeguard Diagnostic. For a universal tool, you can download HDtune. If any of these tools report bad sectors, then it's time to clone. Some tools, such as HDtune, lack the feature to reallocate the bad sectors that they detect. In this scenario, you must also go through the chdsk process as explained above. If bad sectors are not reallocated, then you may receive an IO error during the cloning process. Also note that HDtune will often miss bad sectors when set to run a quick scan.
Q. I ran into a problem cloning a SATA drive to a PATA drive. What should I do?
A. According to 2048Megabytes, you may run into problems cloning a SATA drive to a PATA drive:
Some have reported that they have no issues cloning from SATA to PATA, so it's still worth a try.After many cloning attempts with hard drives I have come to this conclusion with Norton Ghost Version 15. You can clone Parallel ATA to Serial ATA rotary hard drives with no issues. Try cloning Serial ATA to Parallel ATA and you run into problems. The hard drives I was using were a Seagate 10th generation Serial ATA drive and a Seagate 9th generation Parallel ATA drive. The operating system I was cloning was Windows XP 32-bit Service Pack 3.
I also tried cloning Windows XP to the following hard drives:
Seagate 10th generation Serial ATA to Western Digital Model WD400EB-00CPF0 Parallel ATA (made on September 12th 2003)
SAMSUNG Spinpoint F4 Model HD322GJ/U Serial ATA to Western Digital Model WD400EB-00CPF0 Parallel ATA (made on September 12th 2003)
All times I have tried cloning from Serial ATA to Parallel ATA I ran into problems. Whenever I have cloned Parallel ATA to Serial ATA, I have had no issues.
*Important Note Regarding SSDs*
Cloning from a standard mechanical hard disk drive to an SSD is not recommended. When Windows is installed on an SSD versus an HDD, certain SSD-specific features such as TRIM are enabled. These features are necessary for the proper long-term operation of many SSDs. For this reason, it is recommended to do a clean install of Windows on an SSD.
If cloning from an HDD to an SSD is absolutely necessary, I recommend following this guide:
http://www.howtogeek.com/97242/how-to-migrate-windows-7-to-a-solid-state-drive/
Last edited by a moderator: