Benny Boy
Active Member
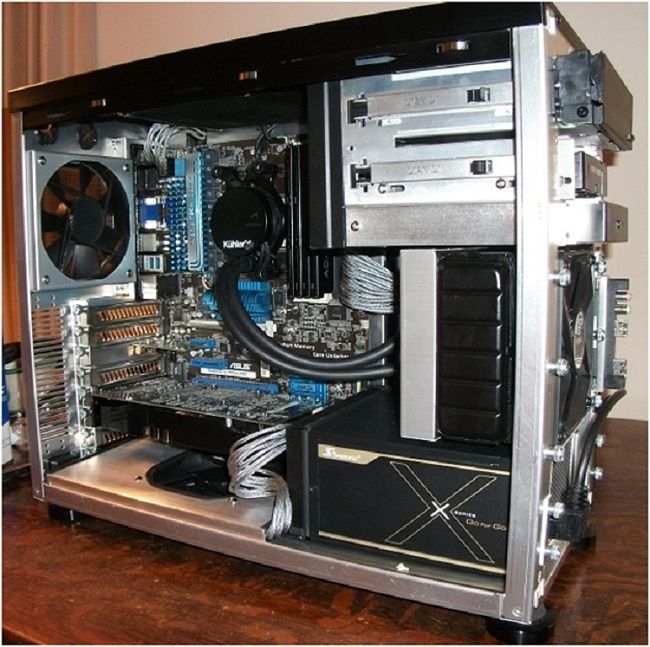
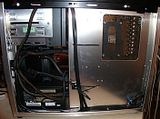
This case. Lian Li Newegg
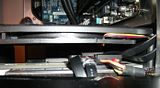
Here it is stock with how the air flow is atm. Might make the botton intake.
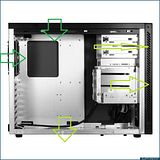
The stock top had a 140mm blank plate.
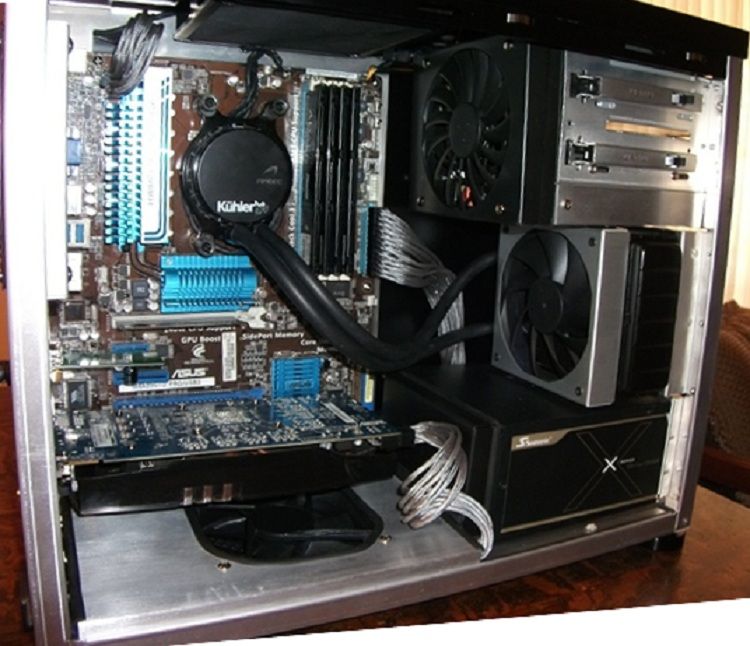
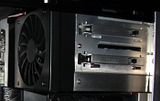
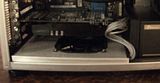
The case bottom has holes for mounting hdd's or ssd's so I mounted a 120mm fan to the underside of the case with 2 of those holes that were well positioned. From this view it looks off center but from mobo to side panel its good. Marked it and used a cutoff wheel/drill. Not the prettiest cut. At least it's on the bottom. Not bad for a rookie fan hole cutter I can dress it up the next time the fan comes out.

The HDD cage with 120mm mount is removable via 6 thumb screws behind the front panel. I removed the cage from the mount and drilling 4 rivets was all it took. After that I cut off the 2 remaining tabs on the bracket to make it flush and ready for the cooler.
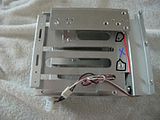
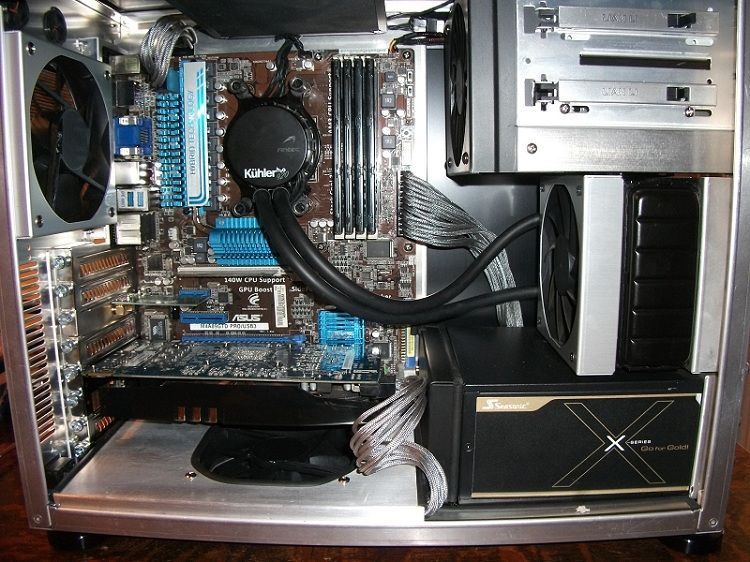
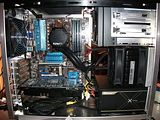
Using a basic 5.25 > 3.5 adapter with a rail on each side, I chopped it to length so I could slide it front/back to position it in the bay. Then notched the front ends so the front grill would slide in. Of course the screw holes didn't line up after that, so drill x4. No anti vibration but the drive runs smooth.
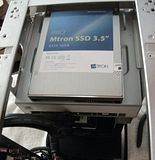
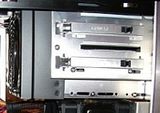
The rest of the drives was basic stuff. Used a 2.5 adapter for 1 ssd behind the card reader and another ssd stickied to the top of the OD.
For ^ that power cable I picked up couple connectors and reworked it to have 4 connectors (instead of 3), and to make it go up.
Only pic atm of the data cables. Those 2 that aren't managed as good as the others are both 90°/90° with left angle/right angle and the only place I could find them only had 24". For a fan gasket I sliced 2 grommets in half.
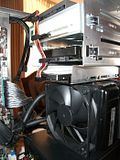
Next is something to cover the back of those drives. Initially thought front bay grills, which would have worked. Then found a 3x 5.25 120mm fan adapter and decided to use that. Its thin aluminum flanges fit between the OD and the cage. Cutting a slit on each side was needed to slide it past the 3.5 recess. Painted it. One screw hole drilled on each side through the cage/fan adapter to hold it. A slim Scythe was used in keeping top/rear>front/bottom air flow. Here's how the fan mount fit and I used part of it to mount a strip of alum to cover the recess.
Here's the early moch up.
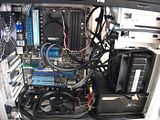
The bottom fan partially installed for false bottom fabrication, along with some cable management contemplation") What a birds nest!
What a birds nest! 
The false bottom and PS end cap. After a trail and error, I picked up a piece of aluminum and had that supplier cut it to my new drawing sizes. Then had a local sheet metal shop fold it into shape. This time for the fan hole I made straight cuts(not circular) and it's quite good. Used the rubber molding that I already had. Almost all the power/usb/case/etc cables are under this false bottom.
Here it is stock with how the air flow is atm. Might make the botton intake.

The stock top had a 140mm blank plate.
The case bottom has holes for mounting hdd's or ssd's so I mounted a 120mm fan to the underside of the case with 2 of those holes that were well positioned. From this view it looks off center but from mobo to side panel its good. Marked it and used a cutoff wheel/drill. Not the prettiest cut. At least it's on the bottom. Not bad for a rookie fan hole cutter
I can dress it up the next time the fan comes out.
The HDD cage with 120mm mount is removable via 6 thumb screws behind the front panel. I removed the cage from the mount and drilling 4 rivets was all it took. After that I cut off the 2 remaining tabs on the bracket to make it flush and ready for the cooler.

Using a basic 5.25 > 3.5 adapter with a rail on each side, I chopped it to length so I could slide it front/back to position it in the bay. Then notched the front ends so the front grill would slide in. Of course the screw holes didn't line up after that, so drill x4. No anti vibration but the drive runs smooth.
The rest of the drives was basic stuff. Used a 2.5 adapter for 1 ssd behind the card reader and another ssd stickied to the top of the OD.


For ^ that power cable I picked up couple connectors and reworked it to have 4 connectors (instead of 3), and to make it go up.
Only pic atm of the data cables. Those 2 that aren't managed as good as the others are both 90°/90° with left angle/right angle and the only place I could find them only had 24". For a fan gasket I sliced 2 grommets in half.

Next is something to cover the back of those drives. Initially thought front bay grills, which would have worked. Then found a 3x 5.25 120mm fan adapter and decided to use that. Its thin aluminum flanges fit between the OD and the cage. Cutting a slit on each side was needed to slide it past the 3.5 recess. Painted it. One screw hole drilled on each side through the cage/fan adapter to hold it. A slim Scythe was used in keeping top/rear>front/bottom air flow. Here's how the fan mount fit and I used part of it to mount a strip of alum to cover the recess.


Here's the early moch up.


The bottom fan partially installed for false bottom fabrication, along with some cable management contemplation
What a birds nest! 
The false bottom and PS end cap. After a trail and error, I picked up a piece of aluminum and had that supplier cut it to my new drawing sizes. Then had a local sheet metal shop fold it into shape. This time for the fan hole I made straight cuts(not circular) and it's quite good. Used the rubber molding that I already had. Almost all the power/usb/case/etc cables are under this false bottom.

Last edited: