Hello and welcome to Computer Forum's Official (hopefully) guide to overclocking your Processor (CPU). This guide should serve as an introductory look at squeezing some extra performance out of your processor. It is not intended for those of you that are out to wring every last MHz out of your CPU, so if you're attempting to break the world record, look elsewhere.
That said, this guide should provide plenty of info and guidance for mild to moderate overclocking and should be more than enough for most. This guide assumes you have no experience overclocking and aims to help beginners learn the basics and refresh more experienced users.
II. Disclaimer
The authors of this guide are experienced with overclocking and seek to advise you in getting the most out of your hardware in a safe way. That said, there is inherent danger and risk involved with doing this. Anything you are unsure of or need clarification feel free to ask here or research around the internet. We are confident that this guide should not lead you to damage your computer if followed correctly. However, we take no responsibility if you cause damage to your computer, components, or any other ramifications from following this guide. This includes violating any warranties. Proceed at your own risk and be careful!
A slight boost in performance is not worth blowing up your machine. When in doubt, don't risk it!
III. Terminology
This guide will use some terminology and acronyms that I'll outline below.
- Clock speed
- Measured in MHz and GHz is the operating frequency of your processor. Higher clock speed equals more performance. Worth noting, different CPU's at the same clock speed does not mean they are the same performance as other factors like architecture and core count come into play
- Front Side Bus (FSB)
- This is the speed of your Front Side Bus, which impacts your CPU, RAM, and PCI lanes functioning speed. This can be adjusted to increase an overclock but is more complicated and risky than sticking to your multiplier since it impacts your whole system. Older CPUs and "locked" CPUs can only be overclocked by adjusting this. I would advise leaving this alone unless you're well aware of the impact from adjusting it or are trying to overclock an older CPU that overclocks well but must be overclocked using the front side bus (for example the Core 2 Quad Q6600).
- Multiplier/Ratio
- These terms are used interchangeably and are what your FSB is multiplied by. Your Speed = FSB * Ratio. My 8320 runs at 200MHz FSB with a 21x Multiplier, resulting in a 4.2GHz clock speed. The ratio is your primary means of adjusting final clock speed in this guide.
- Voltage/vCore
- This is a measurement of current to your CPU. Your CPU will have an automatically determined voltage by the manufacturer (Core VID) and is considered "stock" voltage. These can vary from chip to chip even of the same kind. Higher voltages will make overclocks more stable but will also increase your temperatures at an exponential rate. Generally you can get a mild overclock on stock voltage before having to increase it.
- Thermal Design Power (TDP)
- TDP provides a rough indicator to how hot your CPU will run, meaning two different CPU's both with a 125 watt TDP will require roughly the same amount of cooling. This is a relatively loose measurement but does give some idea of CPU "hotness".
- It is NOT an accurate indication of your actual power consumption, but does give a rough idea. My 8320 has a 125w TDP and consumes 125-re when overclocked. Thanks @mistersprinkles for prompting correction
- Temperature ("Temps")
- Temps are measured in Celsius and indicate the temperature your CPU is at. At idle load your temperatures will fluctuate and depend heavily on ambient temperature, thus you can largely ignore them. At full load, your CPU will get quite hot and is usually a limiting factor in potential overclocks.
- BIOS
- The BIOS is the firmware that runs your motherboard. It is "underneath" your operating system and lets you tweak a lot of settings in regards to your hardware. Overclocking will take place in your BIOS.
IV. What is overclocking and what do I need?
Simply put, overclocking is the process of adjusting the settings of your CPU in the BIOS to make your processor run at a higher clock speed than it comes out of the box and get a performance boost as a result. Doing so naturally will increase temperatures and reduce system stability. This guide focuses primarily on working with unlocked CPU's and overclocking via multiplier adjustments.
As such it is important you have the following.
- "Unlocked" CPU
- Most if not all of AMD's processors these days have an "unlocked ratio" and allow control over the CPU multiplier. On series prior to the current FX series, the unlocked CPUs tended to be the 'Black Edition' models. For example the Phenom II X4 955 Black Edition was an unlocked CPU.
- Intel's unlocked CPU's are usually marked with a K, as in the i7 4770K is an unlocked version of an i7 4770. CPUs marked with an X are also unlocked, for example the i7 980X and the i7 5960X are also unlocked CPUs. CPUs marked with an X are the Extreme Edition CPUs.
- Overclocking friendly motherboard
- Most motherboards these days support some basic overclocking or even advertise themselves for that purpose. Higher end boards will usually be better designed to support higher speeds and temperatures.
- For example my previous MSI 970A G45 motherboard was unable to be stable with my 8320 past 4.1GHz even with voltage bumps. I switched to a Gigabyte 970A UD3 and I was able to run 4.2GHz at stock voltage and push it past that with voltage adjustments.
- It's important that you choose a motherboard with a chipset designed for overclocking. On modern Intel boards, P, Z and X-series chipsets are usually the ones designed for overclocking (with the Z and X-series allowing overclocking of the CPU and the GPU, and the P-series only allowing overclocking of the CPU). On modern AMD motherboards, the x70 and the x80 or x90 chipsets are usually the best for overclocking with, for examle the 970, 880 and 990 chipsets are usually good for overclocking with.
- There are numerous factors that make a good or bad board, so best to just research specific models and go from there.
- Adequate Cooling
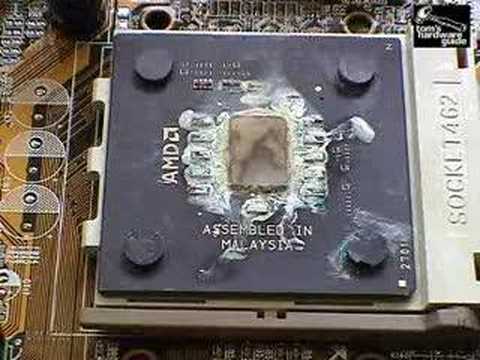
- The stock cooling that comes with most processors is not designed for overclocking and are usually quite abysmal, sometimes even at stock clocks (*cough* AMD).
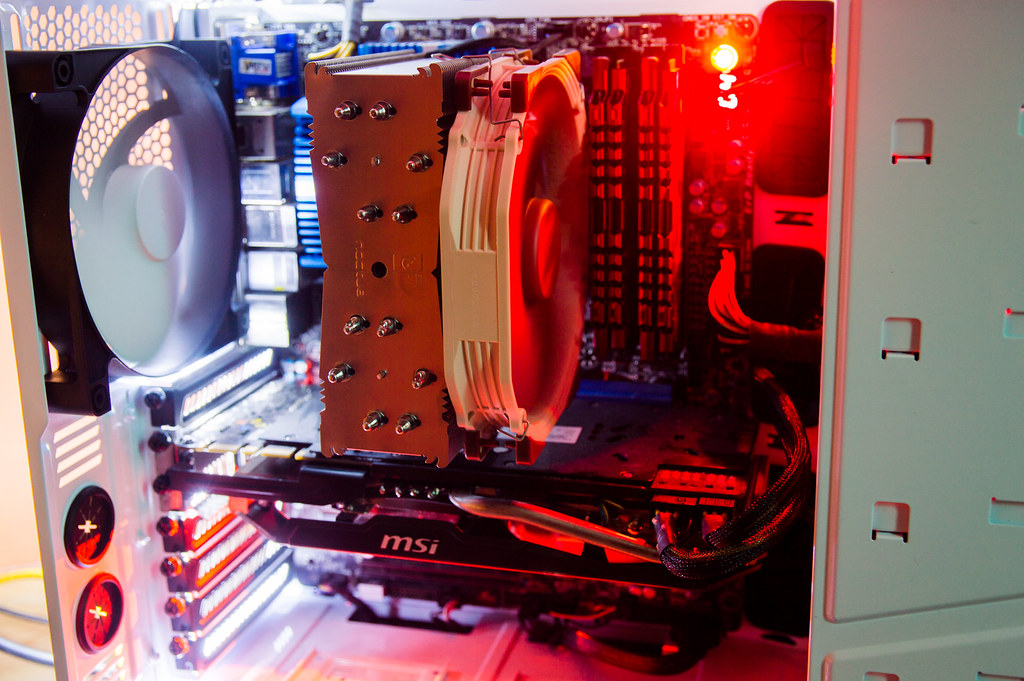
- You'll want to have a higher quality cooling solution, ranging from a fairly entry level air cooler like a Cooler Master 212+ or a higher end water cooling loop like a Corsair H100i. Even with cheaper options like the 212, mild to moderate overclocking is feasible.
- Good airflow within your case is also important and some quality thermal paste is never a bad idea.
- Whether you choose to go with an air- or water-cooled solution depends mainly on your budget and how much you want to overclock. Most of the aftermarket air cooling solutions you see on the market these days are usually good for overclocking providing you have a stable motherboard and good cooling in your case, so there's not always a need to spend lots of money on CPU cooling.
- Good power supply
- While this is critical in any computer, it is downright essential if your overclocking. Higher clock speeds and voltages require more power to run and to ensure stability.
- Don't skimp here, and if your near you're power limits of your current PSU either upgrade it or don't overclock. It's not worth blowing up your machine for a potential slight performance increase because you pulled too much from your PSU.
V. Get your computer ready
Assuming you have everything listed above you're ready to get started. A few final steps before jumping into your BIOS and fiddling around.
- Research what your CPU's specs are including stock voltage, clock speed, multiplier, and FSB. Also research what other people have been able to overclock their same CPU to with similar cooling options and components. Each individual CPU will overclock slightly differently, but getting a rough idea of where you're going to end up is valuable info.
- Also find out your max safe temperature.
- Install CPU-Z from here. - http://www.cpuid.com/softwares/cpu-z.html
- Install a temperature monitoring software, I prefer HWMonitor - http://www.cpuid.com/softwares/hwmonitor.html
- Run the CPU-Z benchmark from the "Bench" tab at stock clocks. Make a note of your scores and maximum temperature reached. Also make note that max voltage your CPU reaches. HWMonitor tracks maxs reached and you should find your CPU voltage marked in there.
- Make sure your BIOS is totally up to date to ensure maximum stability and performance.
- Disable any and all automatic overclocking software, including what might be in your BIOS.
- Optional: Disable any non essential startup software. The process overclocking will require to restart a LOT, so disabling anything you don't need temporarily will speed the process up. You can do this in the startup tab of task manager (Windows 8 and newer) or MSConfig (Windows 7) Of course reenable them when you're done.
Overclocking time!
The following steps should be relatively similar for AMD and Intel CPUs. Consulting your motherboard manual will likely make navigating your BIOS easier.
The general pattern of overclocking is bumping your ratio one notch at a time, benchmark and test for stability and temperatures and repeat until you reach your thermal limit or it gets unstable. From there, voltage adjustments might enable further overclocking.
I suggest writing down or saving a document to record your overclocked settings, their resulting benchmark scores, voltage adjustments, and max temperature. This will make it easier to keep track of what settings work the best and the impact they have.
VII. Ratio Adjustments
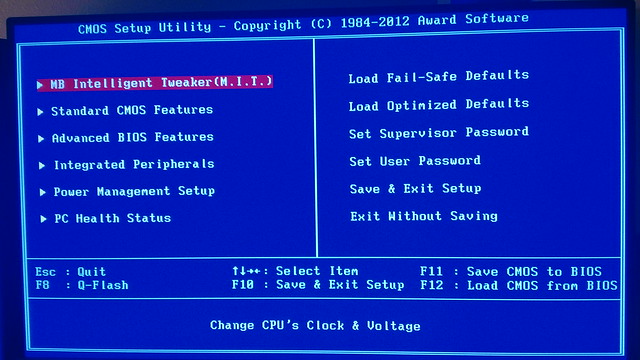
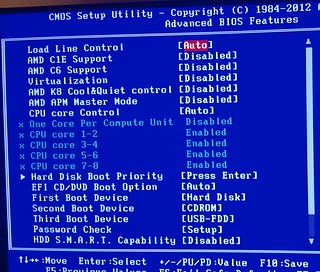
The BIOS on my Gigabyte 970A UD3, very retro.
The BIOS on my Gigabyte 970A UD3, very retro.
- To get into your BIOS you'll need to shutdown your computer completely and press the correct button before Windows boots. This can be tricky if you have a quick computer so you might have to spam the button before Windows loads. The button to enter your BIOS varies from different manufacturers, but is usually F2, F12, or Delete. As the BIOS screen appears, you can usually press the Pause Break key on your keyboard to pause the boot process. Here, you can note down the BIOS key (it's usually written on the bottom of the splashscreen - often referred to as 'Setup') and then you can reboot and press the appropriate key to access the BIOS. If all else fails, check your motherboard manual.
- BIOSes vary greatly in layout and appearance. Explore the different screens and get a feel where everything is and what options are available. Most newer boards will have a BIOS that lets you use your mouse in addition to the keyboard. Mine, pictured above, is a bit older and I have to use my keyboard only.

- Disable any automatic overclocking utilities or functionality. They do a poor job usually and only complicate things.
- Disable any power saving features as they can impact stability and speeds. These frequently have their own tab(s) and can be a bit tricky to find. AMD uses Cool 'n Quiet technology to adjust speeds according to load and temperatures. Intel's SpeedStep is similar. Other options like C6 state, C1E state should be disabled as well. If you're unsure what an option does, consult your motherboard manual or research it online. These settings can have a noticeable impact on CPU performance and should not be ignored. I saw significant benchmark score differences just by adjusting these.
- Make sure your RAM speeds and timings are properly set according to their specifications. RAM with funky timings or incorrect speeds can cause noticeable performance variation and instability, even at stock CPU clocks.
- Many motherboards have an option to set CPU ratio manually or automatically, others let you adjust it directly. Set this to manual if needed. Some boards will require you to enable manual control before letting you change or even the multiplier adjustments.
- Some also have a boost or turbo option that functions a bit like automatic overclocking. Disable this. These are the screens showing CPU settings and power settings on the 970A UD3.
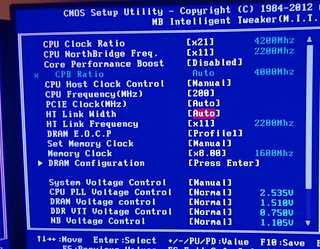
CPU settings in the BIOS
Click to expand
Power saving features in the BIOS, all disabled
- Starting out we'll only adjust the multiplier and leave FSB and voltage alone.
- If your CPU has a turbo or boost clock speed, set the multiplier to match that speed. If not, just set it at stock speeds.
- From here, bump up the multiplier the smallest increment. For my 8320 it goes up by .5 and each bump results in a 100MHz clock speed increase.
- Save settings and reboot.
- Boot into Windows and run CPU-Z and HWMonitor. Run the CPU-Z benchmark.
- Keep an eye on your temperatures using HWMonitor and ensure you don't overheat.
- Record your bench scores and then run the CPU-Z stress for a 5-10 minutes after it seems to reach its max temp. Also make note of what score it tends to hover around. Go longer if you're worried about stability but I usually give it 5 minutes and call it good.
- If stable and temperatures are good, repeat steps 3-7.
VII. Instability and Temperature
Before long you will either run into instability or overheating. Overheating is going to be the limiting factor usually and is only fixed by better cooling or airflow. However better cooling usually will only let you get a couple extra MHz at most as higher and higher clocks will raise temperature and higher voltage to maintain them will raise temperatures even more. Temperatures increase linearly with ratio adjustments and exponentially with voltage. Point being, you're going to hit either a thermal wall or a voltage wall all at once. Or both.
If you're overclock is unstable a number of things could happen.
- Failure to boot or rebooting constantly
- This means your motherboard itself can't handle the overclock you just set. This is a bad scenario! This problem usually occurs when the voltage for your overclock is too low to support your multiplier. You either need to increase the voltage to support the multiplier or you need to reduce the multiplier to support the voltage.
- I've had boot failure at near stock clocks due to incorrect RAM settings. Ensure that your RAM timings are set correctly, you can change this in the BIOS.
- If you are unable to enter your BIOS, you might have to pull out the CMOS battery on your motherboard to reset your settings. Consult your motherboard manual if needed.
- System crash or blue screen
- This normally will happen when running your benchmark or stressing it but sometimes blue screens can happen randomly when your computer is appearing to run at idle due to an unstable overclock. Most CPU instability in this fashion will present itself within a few minutes of running at load but it's not unusual for it take several hours of usage before an unstable overclock causes a system crash.
- Programs crashing or acting strangely
- This isn't as common as normally the whole system crashes, but it's still quite possible. If you get frequently crashing of programs or games after overclocking try downclocking a bit.
- Even programs locking up or just generally not acting right might point towards unstable overclocks.
- Diminishing or even decreasing performance results in benchmarks or usage
- This is usually the first sign you're getting close to being unstable. I frequently see CPU-Z scores level off or start to decline when an overclock is unstable.
- Instability also will show up as brief dips, either in benchmarks or games. CPU-Z I've noticed will bounce around a lot while running the stress test if it isn't getting enough voltage.
- This can be the result of a couple things, your speed being throttled due to insufficient voltage, or your usage is throttled. Either will reduce performance. If you notice that your benchmark scores aren't increasing you can attempt to bump the voltage assuming you have thermal overhead.
- General weirdness
- Overclocking can introduce a whole new range of weird problems that might show up. If you starting having issues after you overclock, even , disabling overclocks should be your first troubleshooting step.
IX. Voltage adjustments and fine tuning
If you've started to get instability but still have some thermal overhead with your temperatures you can start adjusting the voltage. Once you start adjusting voltages you should expect pretty big changes in temperatures. +
- Once you've reach instability, go down one multiplier increment from the speed that was unstable and bump the voltage up one increment.
- Always raise voltage with the smallest increment possible as small changes have a large impact.
- Boot into Windows and test again, noting temperature changes and any potential score changes.
- If stable, continue to fine tune by raising clock speed and voltage as needed.
Run some benchmarks, both for your CPU and games if you're a gamer. Gains in performance will vary between applications but it's always interesting to see what results you can get when overclocking.
X. Conclusion
As you can see this can be a time consuming and delicate process. If you're out to get every drop of performance from your CPU, expect to spend some time and effort doing so. For most though, a mild overclock is easily done and shouldn't take much time.
A few final thoughts to consider
- If you need help, just ask here at ComputerForum.com. Feel free to make a thread with any questions, as we've got a lot of knowledgeable members that can help.
- Overclocking can be hard on your components and wear them down faster than normal. Usually the lifetime difference is negligible, but it is something to think about. As mentioned above, I like to find my maximum clock speed and then bump it back a notch or so to maintain rock solid stability and lower temperatures.
- Don't get in a hurry! Jumping two multipliers at a time or bumping voltage too drastically is a recipe for disaster when you're not familiar with your hardware's capabilities. A little impatience can lead to a big hot paperweight that used to be your motherboard.
- Don't push your hardware too far and know its limitations. Overclocking is a great way to get free performance out of your system, but in the real world usage it usually will net a small to negligible improvement. A couple hundred MHz isn't going to make or break your machine. In the same vein, don't expect massive gains from a $40 motherboard.
- This is a general guide aimed to cover the basics of overclocking on a wide variety of CPUs and motherboards. There are so many combinations of CPUs and motherboards around that we cannot possibly tell you what settings to use to achieve your desired overclock. There are plenty of specific overclocking guides for many popular CPU and board combinations online, so if you want to find precise settings for your CPU and motherboard then there may be guides online outlining specific details for your platform.
- Have fun! Spending the time and effort to really harness your computer's power is a satisfying experience. Enjoy the process and the extra performance you'll get.

Happy Overclocking!
Feel free to make suggestions or ask questions.
Revision HistoryFeel free to make suggestions or ask questions.
April 25th 2016 - Original Posting
August 13th 2016 - Slight tweaks and typo fixes
Last edited:
")
") I only ever have done it via the FSB on accident when I bumped the frequency up to 203 from 200.
I only ever have done it via the FSB on accident when I bumped the frequency up to 203 from 200.