wolfeking
banned
Linux 101
A special thanks to Chromewell for sponsoring. Another special thanks to NyxCharon for his aid in creating the guide.
Linux is a free and open source set of projects that are operating systems for your computer. Having a working knowledge of the command line of Unix or Windows, or for that matter, another Linux, can help in any Linux. Linux is looking at a no nonsense, secure OS that is free. Like Windows or OSX, Linux carries a wide support for programs, and for some is the preferred programming environment for software.
There are several different versions of Linux. They will be linked at the end of the guide so you may download a version of your own if you want to.
To start, be sure that your computer meets the minimum requirements to run your Linux Distro. I would suggest a 2 GHz single core or 1.33 GHz Dual core, and 1GB of RAM to run Linux to its full potential.
The next step works for them all, no matter your current OS. Navigate through your browser to the site of your Linux version of choice. You will then need to download the .iso of your Linux distro and burn it to a CD/DVD (this can be done via mounting the .iso to a virtual drive if running a Vbox install) or via USB installer.
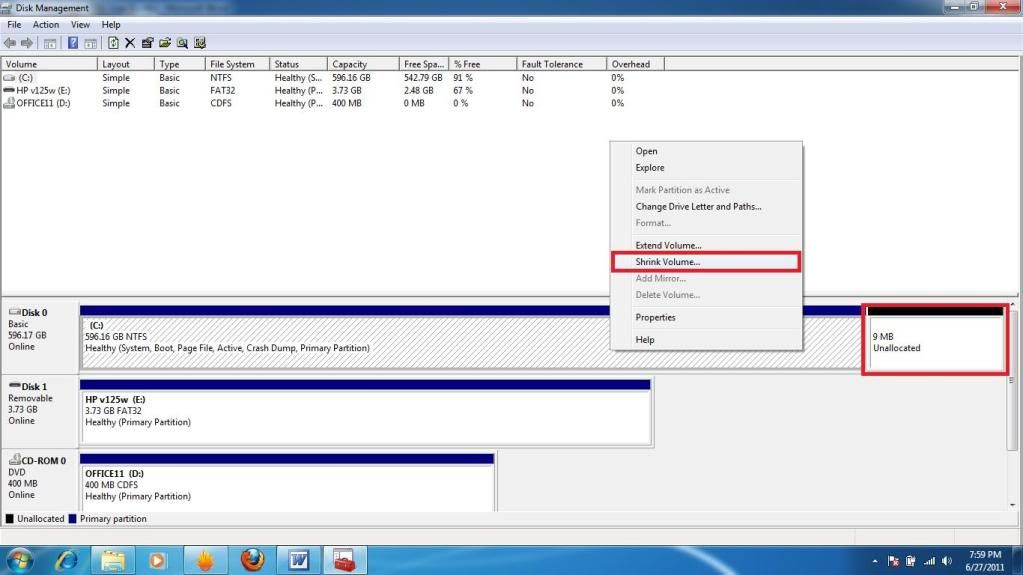
Assuming that you want to install via a Dual boot with Windows, the next step will make your installation job way easier. You will (assuming that you are using Windows Vista or 7) need to open the start menu and type “partition’’ in the search box. This will bring up the partition manager. You will need to add some empty space to your drive (10mb is fine) so that Ubuntu will recognize it and allow for the easy dual install wizard to start. This step is not necessary if you feel comfortable with manually partitioning your hard drive. I am not comfortable with it, so I use the wizard.
All you have to do in Partition manager is right click on your main partition, select shrink, and enter the value you wish in Megabytes (1024MB = 1GB). Then it will show up as Unallocated space. This is necessary to Dual Boot without chance of screwing your windows files.
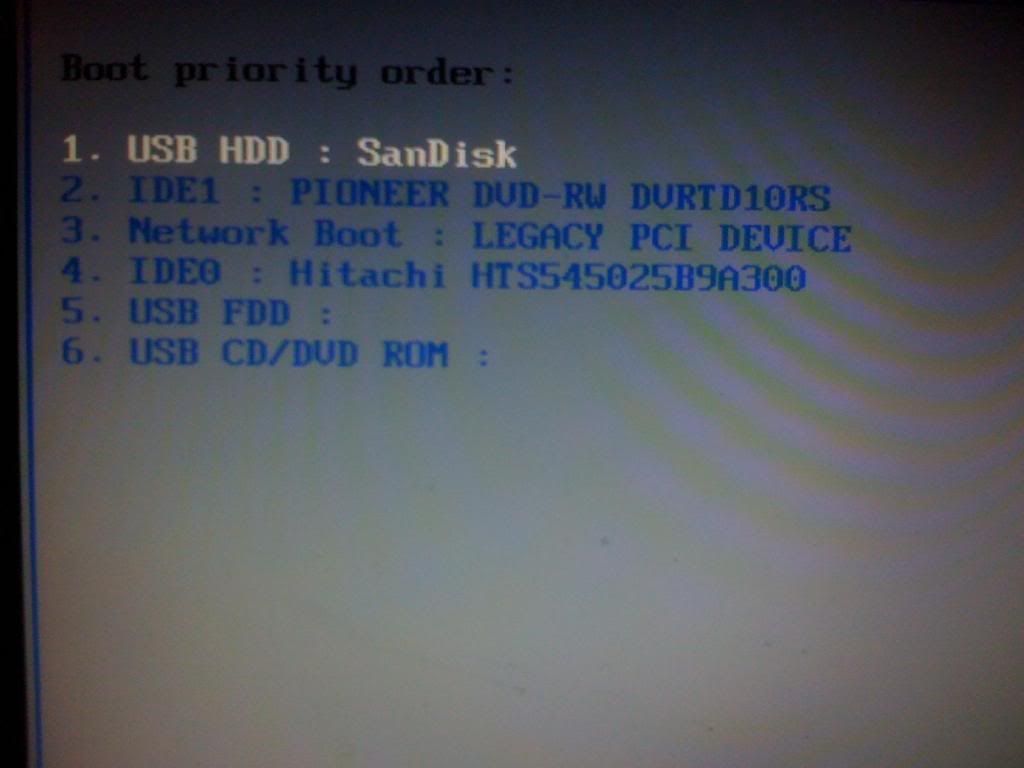
Then, you will need to shut down your computer and boot into the BIOS. In the BIOS, you will need to either set your CD/DVD drive as the primary boot device, or boot from your optical drive. (or set you Flash drive as main if you go that route) (below Sandisk is my flash key, IDE1 is the DVD drive, and IDE0 is the hard drive).
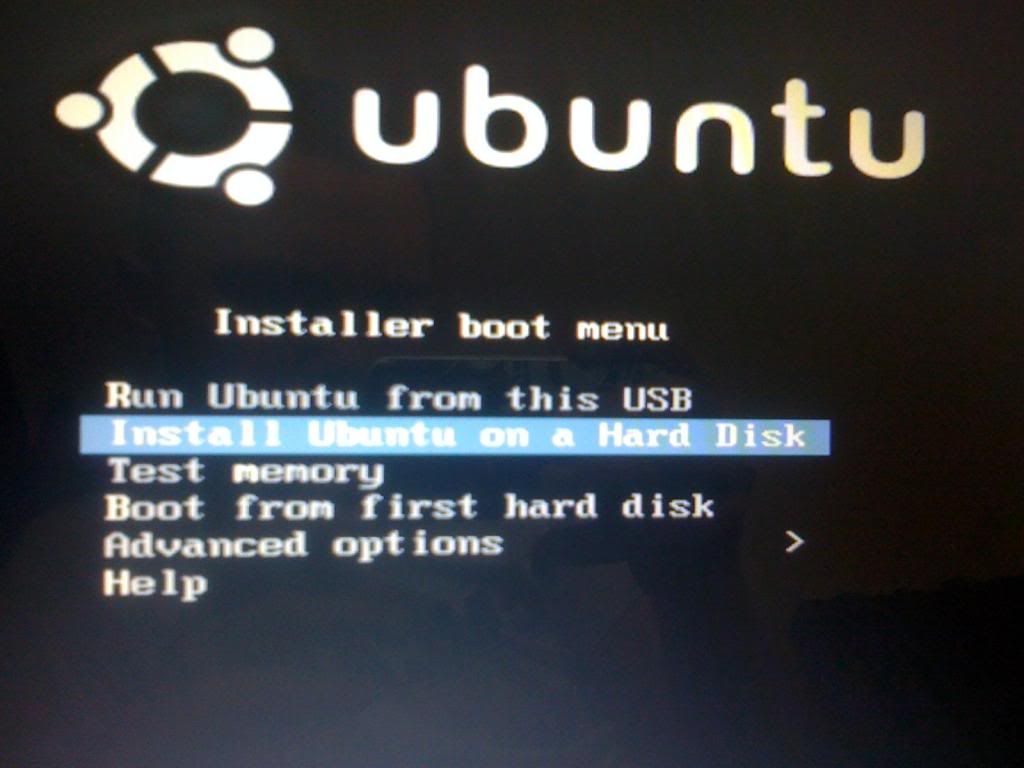
If you are running it from a flash drive, you will have to select Install to a hard drive. As is highlighted in the picture below.
Ubuntu 10.04.2 LTS Install
Ubuntu is one of the most widely used Linux distros in the world. It has very wide Language support (it tells me in my native tongue, so no Italian → English dictionary needed), and is overall easy to use. I believe that the easiest way to explain Ubuntu to someone that has never used it is “Its the Windows of the Linux world.” This takes a little explaining. Ubuntu, in all of its freeware wonder, hides everything behind a wizard, and Behind Gnome/Unity. This leaves the people that use it as a near to primary OS, lacking when they need to use Terminal to do anything. Even I fell into this trap. To summarize, I would suggest Ubuntu to anyone looking to transition from Windows to Linux, and have a very large support base. To anyone else, Choose a different distro.
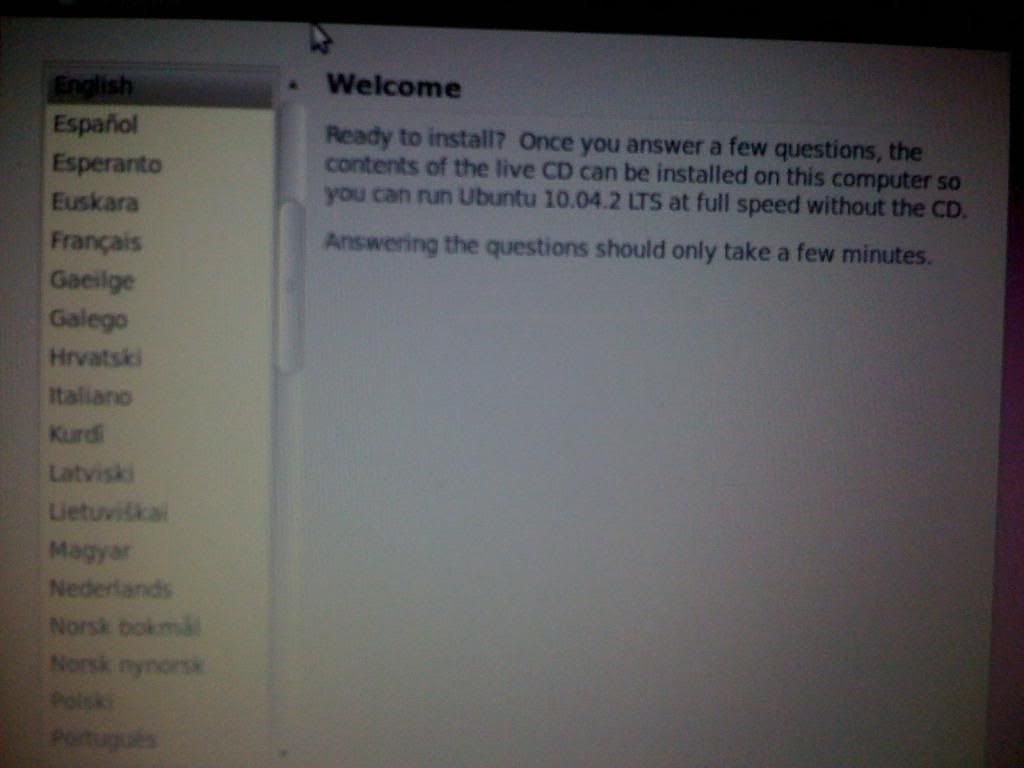
When you boot the Linux (Ubuntu at least) disk, it should start with a black screen that says “isolinux …. “, then proceed to a purple screen with the Ubuntu logo. Then, you will get to a screen that you select the language and to either Live boot (run OS from the disk)
If you go to the Install section, it will say “setting up clock” then proceed to a screen on which you select your Region and Time Zone.
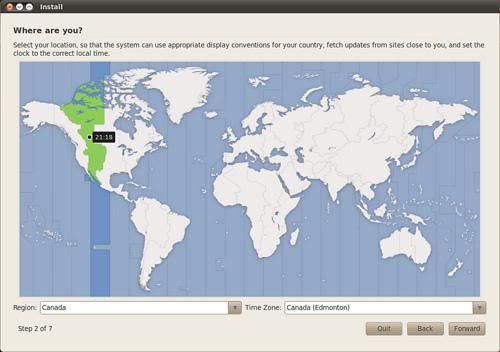
After selecting the correct time zone and country, you will proceed to the screen where you have to select the correct option for the keyboard. The default option (on my disk) is USA, and a few keystrokes show that it is the correct option.

Forth screen is the Partition manager. If you plan to dual boot, you will have to select your desired partition size. The installer below shows the use of that unpartitioned space. The installer recognizes the unpartitioned space, and will give you the “install them side by side” option where you can use the bottom slider to choose how much space is given to the Ubuntu partition. The default is 1/3 the empty space on the drive.
If you want Linux only, choose delete hard drive.

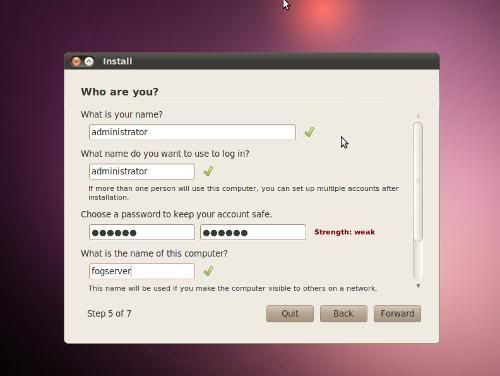
Once you select your partition size, the next step is to put in your user name, computer name, and password.
The next step is importing documents from other partitions. You can skip this step by clicking forward. This will import any documents that you have on your Windows partition. It will also import your desktop wallpaper.
After this, you will be given a chance to review your choices, and then begin installation.
Next up I would suggest that you enable DVD decoding. For this you will need Ubuntu Restricted Extras and some command line instructions.
You will need to download the Restricted Extras. You can direct your browser in Ubuntu to http://www.omgubuntu.co.uk/2010/04/10-things-to-do-after-installing-ubuntu-10-04-lucid/ and scroll down to number 3. Press install codec’s, and you will be a third of the way there.
Next you will need to open the terminal to enter the needed code. Terminal can be found at applications -> accessories -> terminal. Once there you will need to enter
Code:
sudo apt-get install libdvdread4
Code:
sudo /usr/share/doc/libdvdread4/install-css.shYou may need to install Ubuntu tweak that can be found at omgubuntu above to get some apps that are not available at the software center of the Ubuntu OS. Either way it offers an easy way to mod your system to your liking should you want to.
PClinuxOS 2011
*I believe that the site that I used to learn the basics of this OS says it best.
I would suggest this OS for any computer that you need to get working that has low specs. Below are the minimums, though they are bendable (less RAM, and have ran a Pentium 3 850 underclocked @ 600 *just to see, and there is very little change in performance.*PCLinuxOS is a great distro for individuals who favor rolling updates, performance, and a dedicated community. If you’re a first-time Linux user or if you favor aesthetics over technological prowess, better choices are available.
PClinuxOS system requirements are similar to the ones for Ubuntu.
- PC with 800 MHz or higher processor
256 MB of Ram (The more the better)
Hard drive with 6 GB of free space
SVGA or higher resolution
monitor
CD-ROM or DVD drive
Keyboard & Mouse
Compatible sound card and speakers or headphones
Compatible 56 Kbps hardware modem, cable modem, or DSL modem
Ethernet card for Internet/LAN connectivity
Once your computer loads all the information necessary, it will display the KDE desktop screen of PClinuxOS. It should look similar to the picture below.*
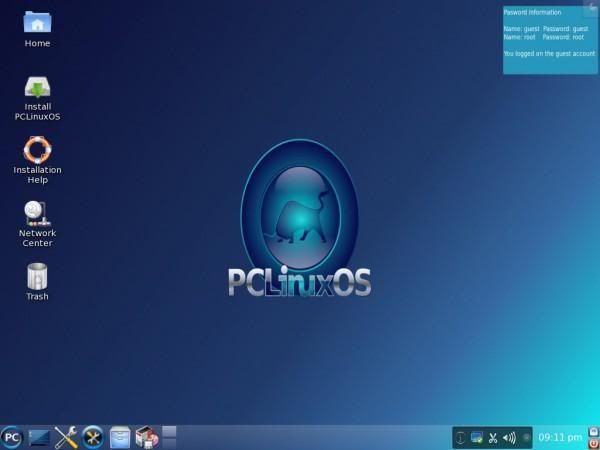
From here, you will single click on the install shortcut, and navigate through the wizards. Once install is done, you will need to restart your computer. Upon next boot, it will take you through the user setup (much like a new windows computer). From there, your work on setup is done.
PCLOS’s terminal uses BASH commands, so if you wish to use the terminal here, I would suggest that you familiarize yourself with basic BASH commands.
As far as I can tell, this OS comes with an excess of applications for use, and is pretty efficient at using them. However, I have yet to discover the art of adding new programs to it. It seems to be a very stable operating system for basic task like web browsing, word processing, and other simple task. However, if you need more control of your programs, and easy control, you need a different OS.
Mint 11 Gnome
Mint 11, as far as the install is concerned, is for demonstration sake, a cross between the Ubuntu and PCLOS install processes. The install starts from live boot, and via the install shortcut in the desktop, will proceed to an Ubuntu style install wizard.**Mint 11 and Ubuntu 10 are nearly identical in their basic use and coding. The main difference that I can see is looks. The setup procedure on first boot is the same as Ubuntu, and thus has the same steps. *Terminal usage in Mint gnome is the same as Ubuntu, thus in the terminal review below, the two will be combined.
Mint does have an advantage over Ubuntu. Mint has a myriad of included software that will limit what you need to install yourself.*
-
Graphics: GIMP, Simple Scan, gThumb, LibreOffice Draw
Internet: Firefox, Pidgin IM, Giver, Sun Java 6, Thunderbird, Transmission, XChat IRC
Multimedia: Banshee, Brasero, GNOME Mplayer, Movie Player, Sound Recorder, VLC Media Player
Office: Dictionary, LibreOffice
Mint does have a entertainment value over Ubuntu. Mint doesn’t need any modification at all from the default to get DVD disk to play back. This, so far is the tipping point that caused me to go to Mint over Ubuntu.*
More Info
There are many versions of Linux out there, and I am sure that most of them will have similar options to install. I fully intend to try some other Linux installs in the near future to check this.*Sites for Popular Linux installations are below.*http://www.ubuntu.com/http://linuxm....archlinux.org/http://www.pclinuxos.com/Other popular Linux distributions can be found via distrowatch at http://distrowatch.com/.*(So far the following is Ubuntu instructions, other OS’s are to follow)
Once you have installed Linux on your system, there are a few things that you will need to do to get your system fully operational. If you have a system with ATI (AMD) or Nvidia graphics, then you will need to download and install the drivers for these cards. This is done via system → administration → hardware drivers. It will search and install the drivers for you (assuming it’s hooked up to the internet). *
An app that is mighty necessary to run Windows applications in Ubuntu is wine. To find it just go to the software center (under applications), and search for wine. Once installed, it is easy to run your app, if it is compatible. Not all windows programs are compatible at this time, but with every wine update, the number of compatible apps grows. *
There are many apps that are free in Ubuntu software center and Ubuntu tweak. Check them out for your necessary applications.*
Rather than take ages to type out a list, you may find many freeware applications to replace your windows applications at the website below.http://wiki.linuxquestions.org/wiki/Linux_software_equivalent_to_Windows_software*still editing* to be continued in 5 minutes *editing*
Window Managers
Window managers (WMs) are X clients that provide the border around a window. The window manager controls the appearance of an application and how it is managed: the border, title bar, size, and ability to resize a window are handled by window managers. They come in three flavors: Stacking, Tiling, and Dynamic
Stacking (floating): All windows are like a piece of paper. You can drag and change the size of each one. They also stack on top of each other, like a bunch of pieces of paper on a desk. Windows and OSX both use stacking
Tiling: The WM tiles each window, so that it gets resized and reposition amount the already placed windows. Depending on the window manager and layout, it can be rather simple such as 4 windows in a box pattern, to rather advanced having each window bind to a certain position with a specific size. Most tiling WM have a heavy reliance on key bindings to help make this setup very easy and efficient to manage.
Name: Gnome 3.0.0
Screenshot(s)
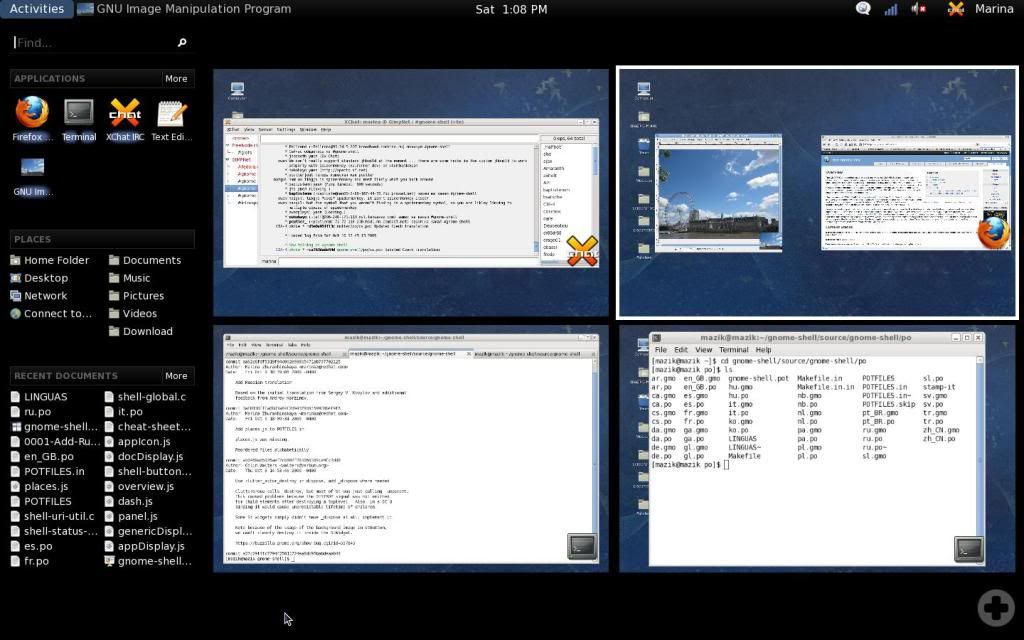
Window Type: Stacking
Basic Summary: Fairly heavy in nature, Gnome is the WM of choice for Ubuntu (current as of 10.04.2). Comes equipped with plenty of base packages, and everything you need to keep up with everything you will need. Gnome has many little wizards to make your Linux experience an easy transition from windows. For example the internet is all wizard based and you need literally no experience to use it.
URL:www.gnome.org
Name: KDE
Screenshot(s)
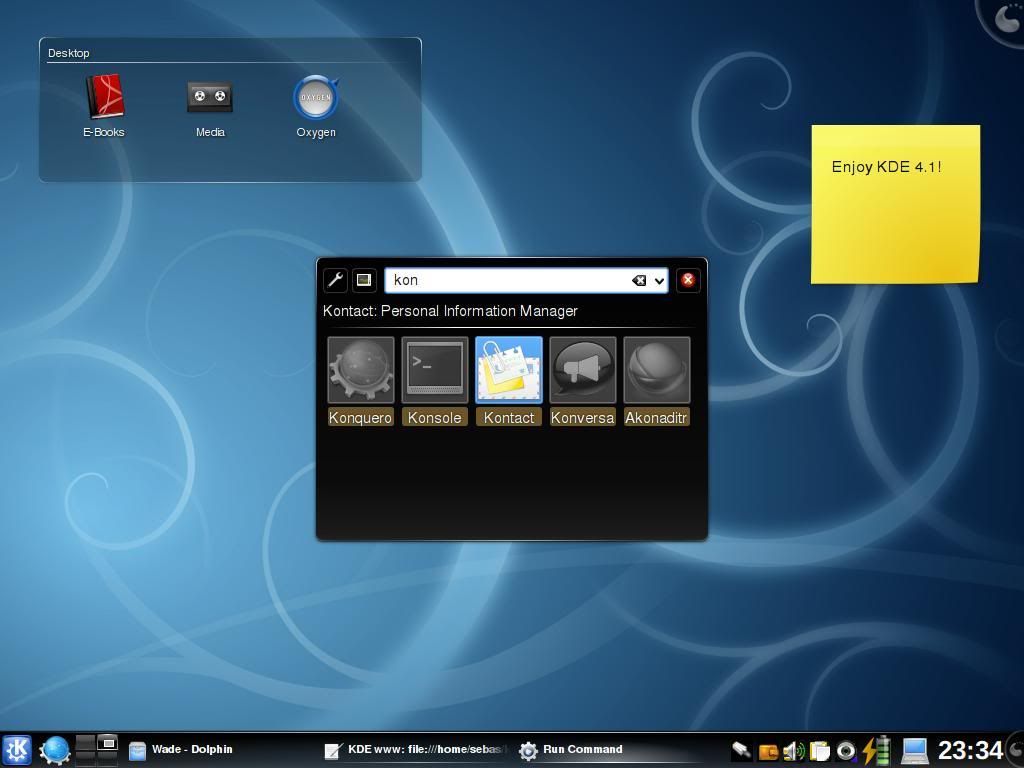
Window Type: Stacking
Basic Summary: Next to Gnome, KDE is the next most popular WM. It is easy to learn, and not complicated.
Also a bit of useful KDE knowledge
URL: kde.orgwiki said:Brazil’s primary school education system operates computers running KDE software, serving nearly 52 million children. Besides this, a thousand more students in Brazil use KDE products in their universities. KDE software is also running on computers in Portuguese and Venezuelan schools, with respectively 700 thousand and one million systems reached. Germany uses KDE software in its embassies around the world, representing around 11,000 systems. Through use of Pardus, a local Linux distribution,[105]*many sections of the Turkish government make use of KDE software, including the*Turkish Armed Forces[106],*Ministry of Foreign Affairs (Turkey)[106],*Ministry of National Defence (Turkey)[107],*Turkish Police[106], and the*SGK*(Social Security Institution of Turkey)[106][108], although these departments often do not exclusively use Pardus as their operating system.
Name: XFCE
Screenshot(s):
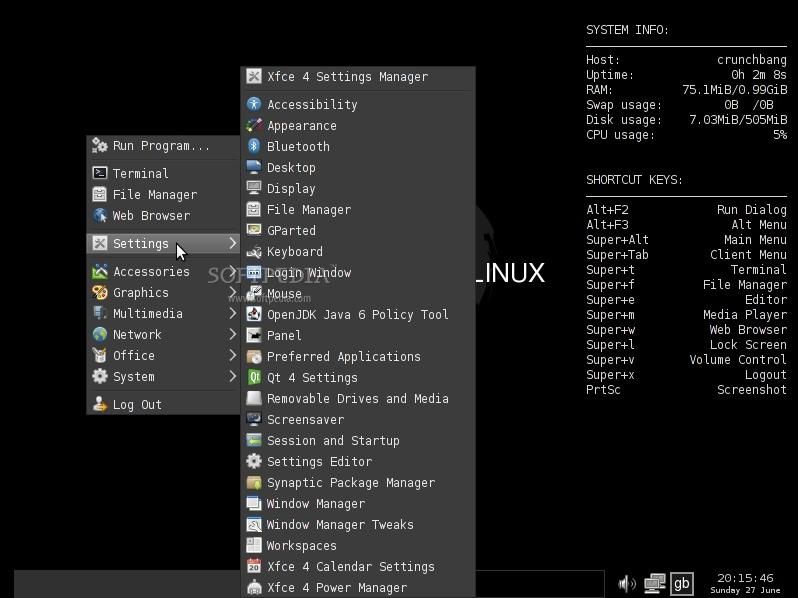
Window Type: Stacking
Basic Summary: Xfce “aims to be fast and low on system resources, while still being visually appealing and user friendly.” It’s good for older computers since it’s fairly light weight, but it also allows for a lot of tweaking if your into customizing every part of your window manager.
URL: www.xfce.org
Name: Enlightment
Screenshot(s):
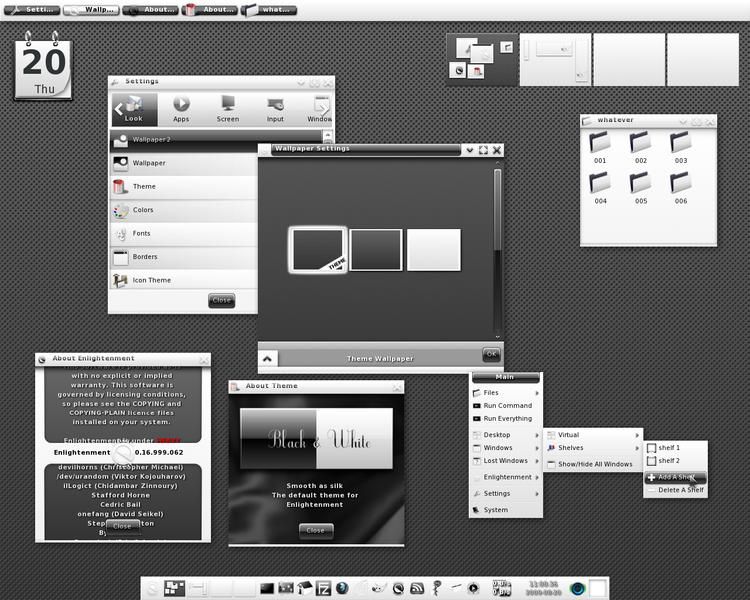
Window Type: Stacking
Basic Summary: “The window manager is a lean, fast, modular and very extensible window manager for X11 and Linux.” One of the main things enlightenment tries to sell is its looks. It is supposed to be very easy to customize, and allow for a drastic amount of customization.
URL: http://www.enlightenment.org/p.php?p=about&l=en
Name: Openbox
Screenshot(s):
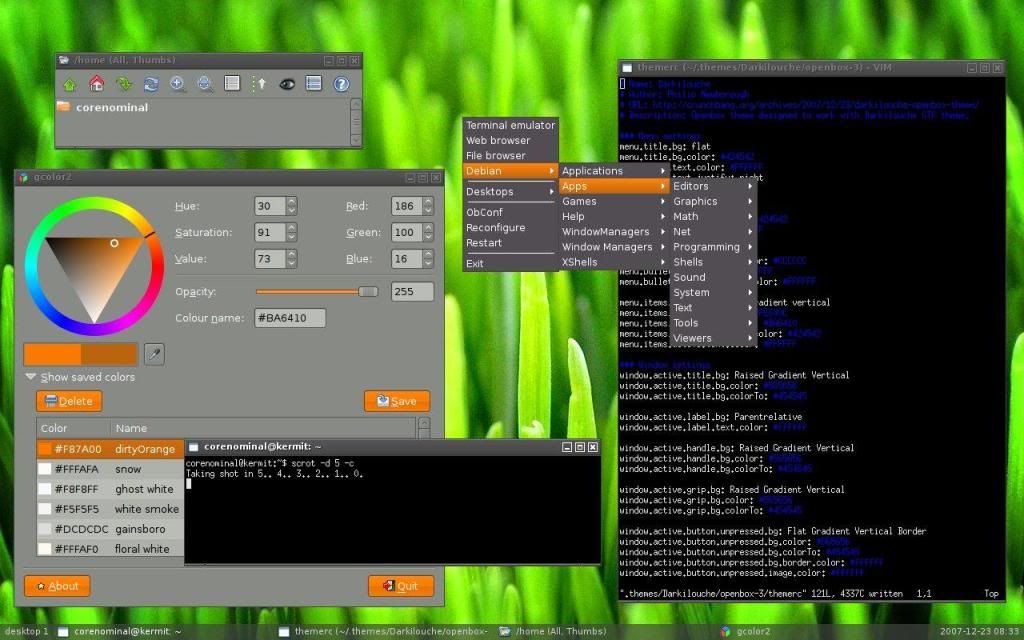
Window Type: Stacking
Basic Summary: Openbox is a very, very fast window manager. It is very light on resources, and doesn’t have a lot if any bloat to it. All(most) configuration is done via config files, so it can be tricky to get looking the way you want. Great for old hardware
URL: http://openbox.org/
Name: Awesome WM
Screenshot(s):
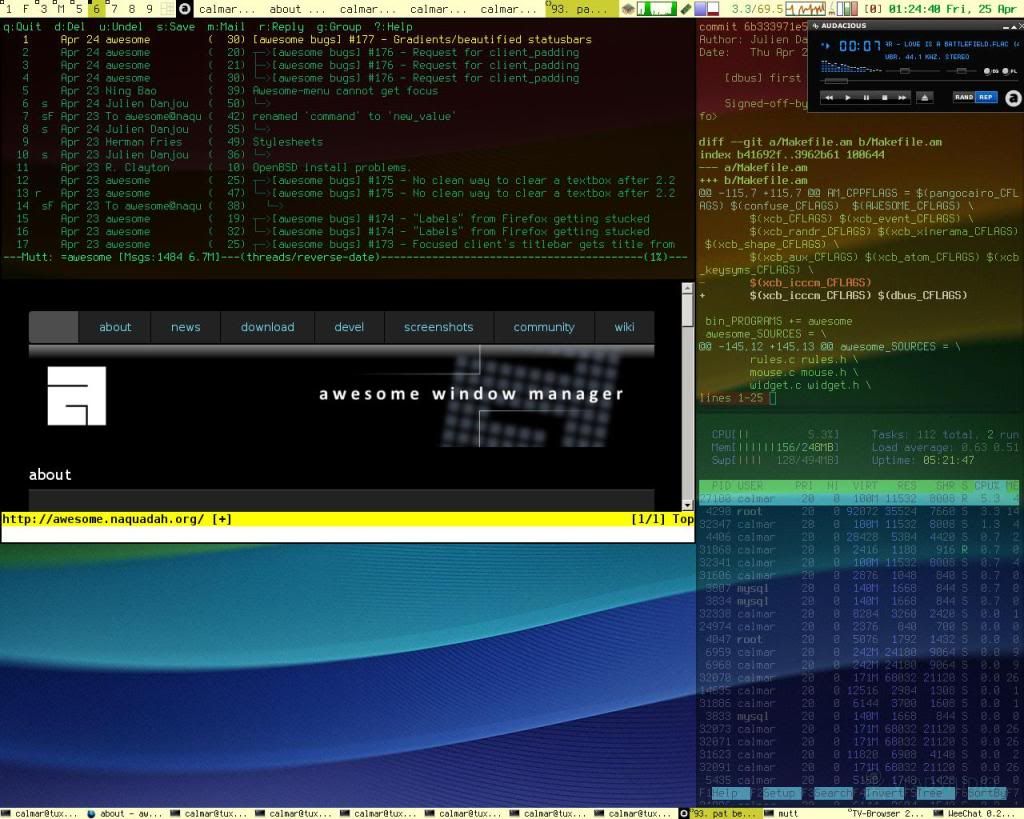
Window Type: Both
Basic Summary: Awesome is a hacker’s dream. It is completely customizable in almost every aspect. It can setup for stacking or tiling, or even both at the same time. It is also light on the resources, which is an added plus.
URL: http://awesome.naquadah.org/
Name: LXDE
Screenshot(s):
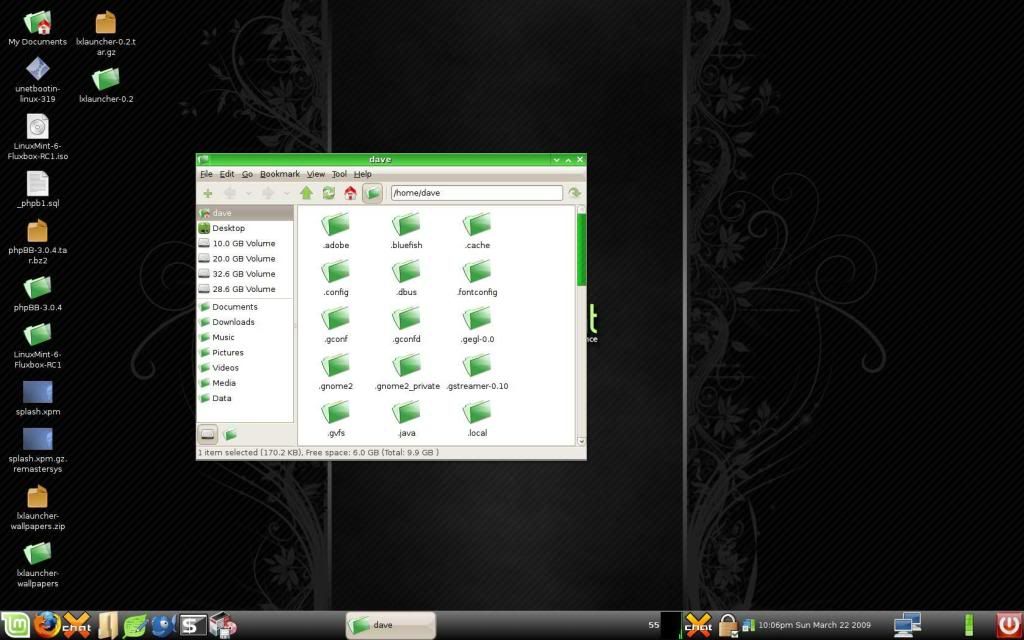
Window Type: Stacking
Basic Summary: LXDE focuses on one thing-speed. Obviously, it is a very efficient, very fast window manager. It looks almost similar to windows in a way and the menu setup is similar as well. Overall a top choice if speed is the most important thing to you.
URL: http://lxde.org/
Name: ScrotWM
Screenshot(s)
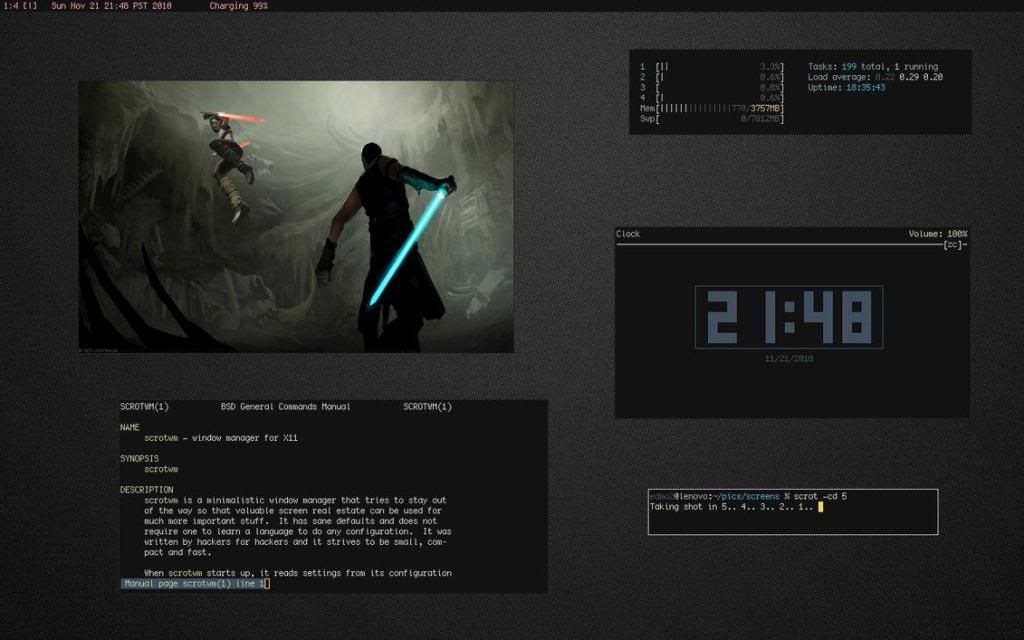
Window Type: Both
Basic Summary: ScrotWM is a good first choice for someone wanting to use a stacking/dynamic window manager for the first time. The way it is setup most functions can be done with key bindings so you spend less time on the mouse and more time doing what you want to do. It auto stacks windows as you open them, and you can then pop them out from the stack with a keybind. Very efficient window manager if you multi task a lot.
URL: http://awesome.naquadah.org/
Basic Terminal Commands and Uses
sudo – grants root privileges without being logged into the root account. Example: sudo apt-get update would check for updates to all the packages you have installed.
ls – list all files in the current directory
mount /pathToPartition /PathToMountTo – mount lets you mount partitions without the need for some graphical interface. You simply mount it to wherever you specify. Example: sudo mount /dev/sda8 /media/storage would mount the partition to the folder storage in your media folder.
cd (change directory) – does exactly what you think it says. It takes you to the specified folder. Example: cd /media would change you over to the /media directory.
pwd – shows the current working directory.
cp – copys files. Example: sudo cp file1 /home/john/file1
rm – removes files. Example: sudo rm file1 assuming file1 is in the current working directory.
rmdir – removes directories. Example sudo rm /media/storage
mkdir – makes directories. Example sudo mkdir /media/storage
apt-get <flag> - if you use this package manager, you can specify install, update, remove, dist-upgrade, upgrade etc as the flag. Example: sudo apt-get install gedit
For more information on these and other commands, including their syntax and possible flags/usage see http://www.linfo.org/ It’s a great site for information on the various commands.
Last edited:

") A couple questions (and if this thread is not meant for asking questions, please let me know and I'll delete the message, or a mod can move it).
A couple questions (and if this thread is not meant for asking questions, please let me know and I'll delete the message, or a mod can move it).