You are using an out of date browser. It may not display this or other websites correctly.
You should upgrade or use an alternative browser.
You should upgrade or use an alternative browser.
White Dragon - watercooled mini ITX project build log
- Thread starter mr.doom
- Start date
mr.doom
Member
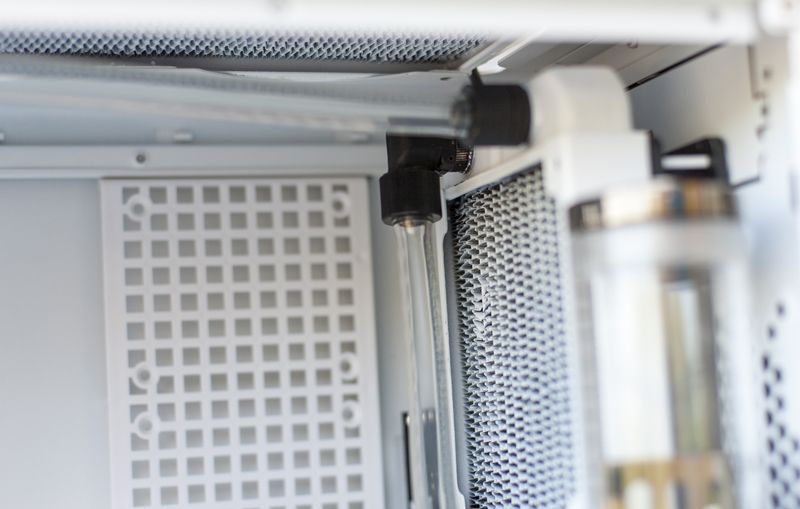
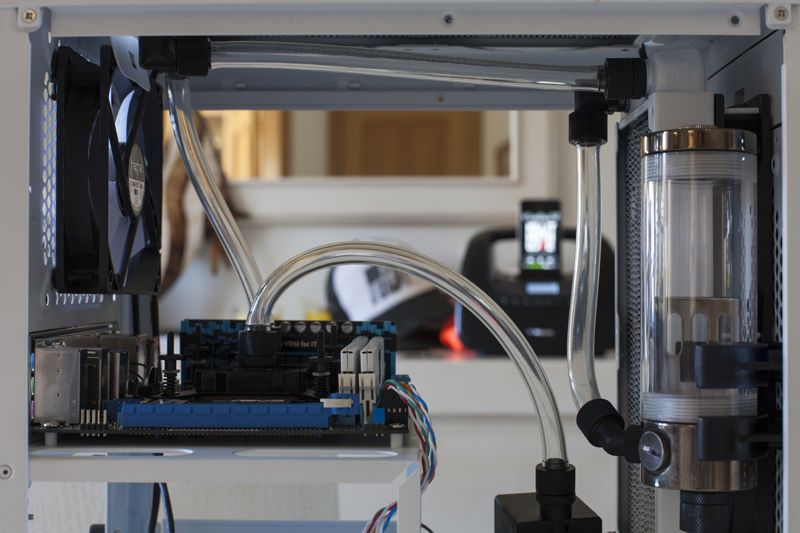
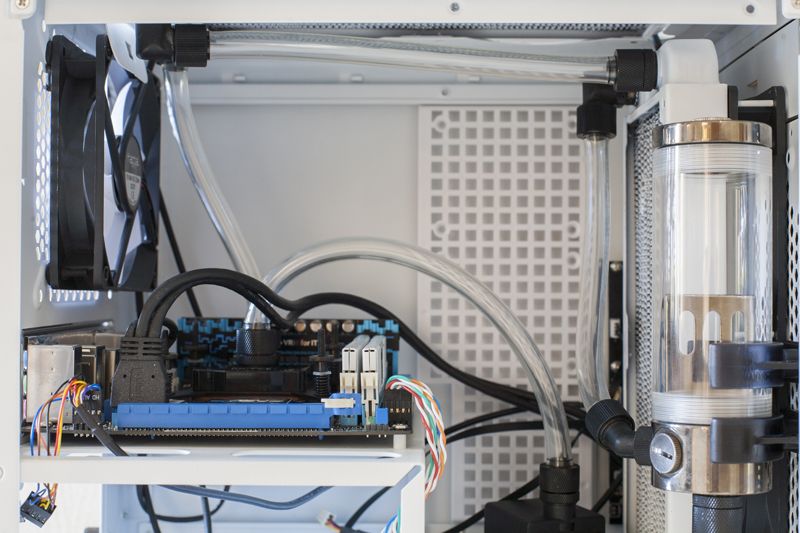
Today I received fans and the reservoir. Of course I noticed, I ordered incorrect amount of fans, should've ordered 5, but instead I ordered 4  Took me a little time to mount everything but eventually I did.
Turns up I had to make little compromises here and there. The fans for the top radiator had to go on the top, otherwise I wouldn't be able to mount the 45 degree fittings properly. I will have to order some nice shroud to cover the fans, as well as buy some white perspex to cover the fans and the radiator from all the sides (sort of perspex box with the shroud on the top. Similar story to the front radiator, only here I could mount the fans in between the radiator and the front of the case. Finally, with no room to spare, I installed the reservoir. That, of course, presented another challenge: The hinge of the side panel doesn't fit in between the case and the reservoir bracket. Luckily there's enough clearance between the panel itself and the reservoir, and tomorrow I get my Dremel kit delivered, so I will be able to cut away the 5 cm or so of the hinge that otherwise would intrude onto the reservoir bracket. Here are some pictures from today:
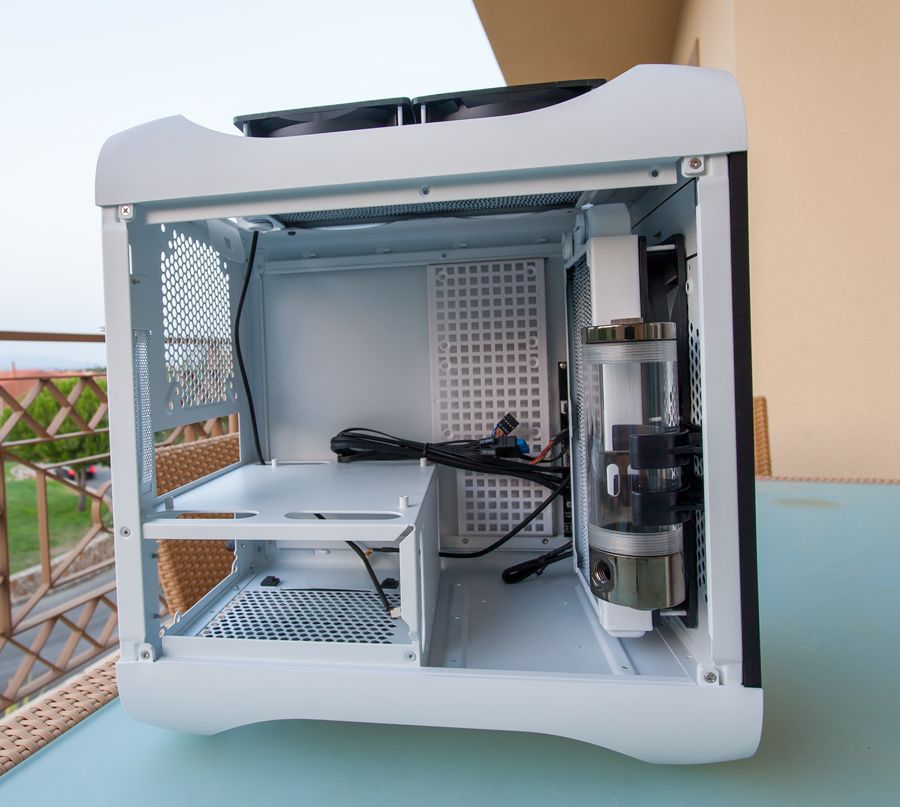

Took me a little time to mount everything but eventually I did.Turns up I had to make little compromises here and there. The fans for the top radiator had to go on the top, otherwise I wouldn't be able to mount the 45 degree fittings properly. I will have to order some nice shroud to cover the fans, as well as buy some white perspex to cover the fans and the radiator from all the sides (sort of perspex box with the shroud on the top. Similar story to the front radiator, only here I could mount the fans in between the radiator and the front of the case. Finally, with no room to spare, I installed the reservoir. That, of course, presented another challenge: The hinge of the side panel doesn't fit in between the case and the reservoir bracket. Luckily there's enough clearance between the panel itself and the reservoir, and tomorrow I get my Dremel kit delivered, so I will be able to cut away the 5 cm or so of the hinge that otherwise would intrude onto the reservoir bracket. Here are some pictures from today:
Last edited:
mr.doom
Member
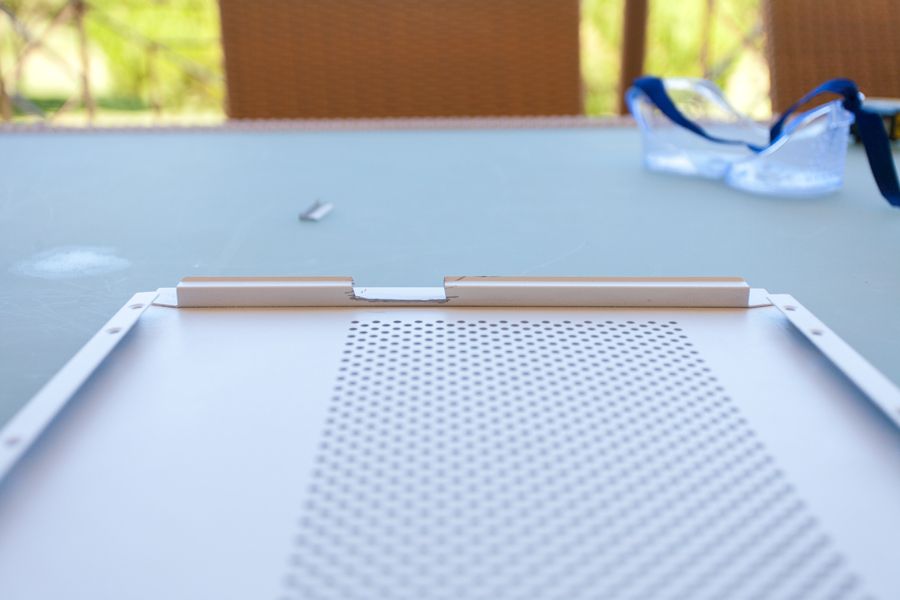
I finally got my Dremel and I managed to make cut in the side panel hinge. Give it, it's not the most pro cut you'll ever see, but it was my first time with a Dremel tool, and this will be completely out of sight, so I'll just spray paint it white. Anyway, I didn't paint it yet, as the window kit will be coming sometime soon and there will be much more cutting done to this side panel (this time with much more precision).
mr.doom
Member
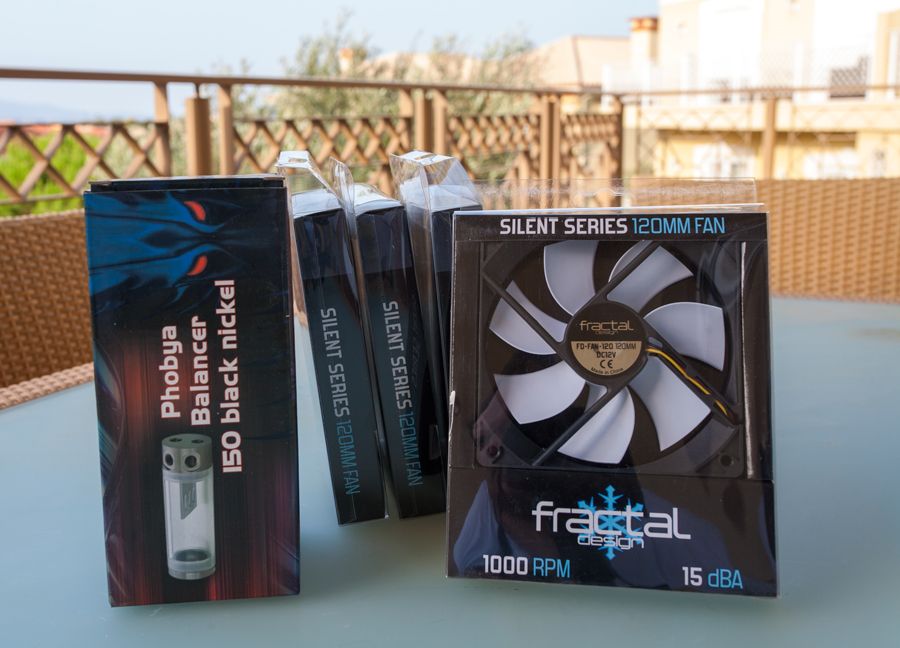
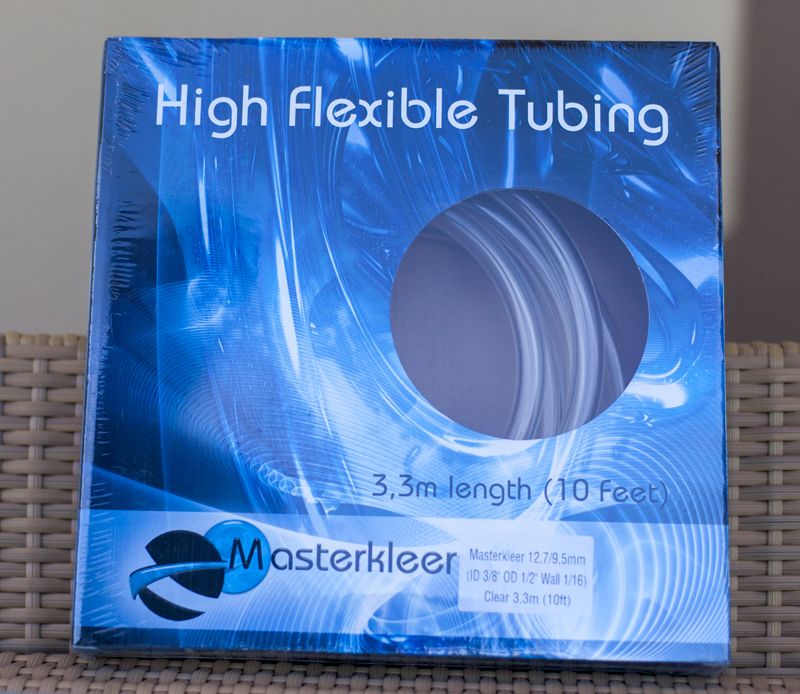
I's been a while, but the rest of my watercooling parts got delivered. Here it is:
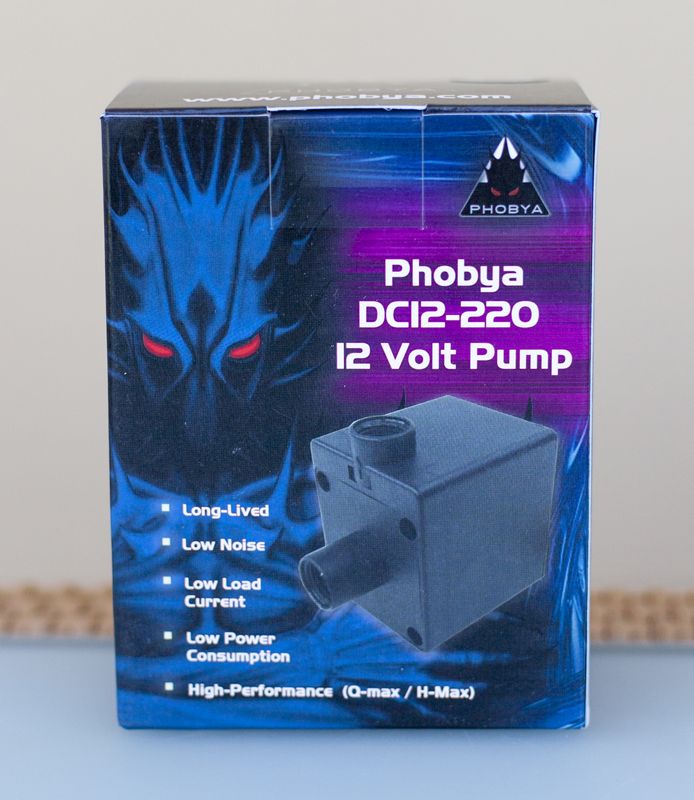
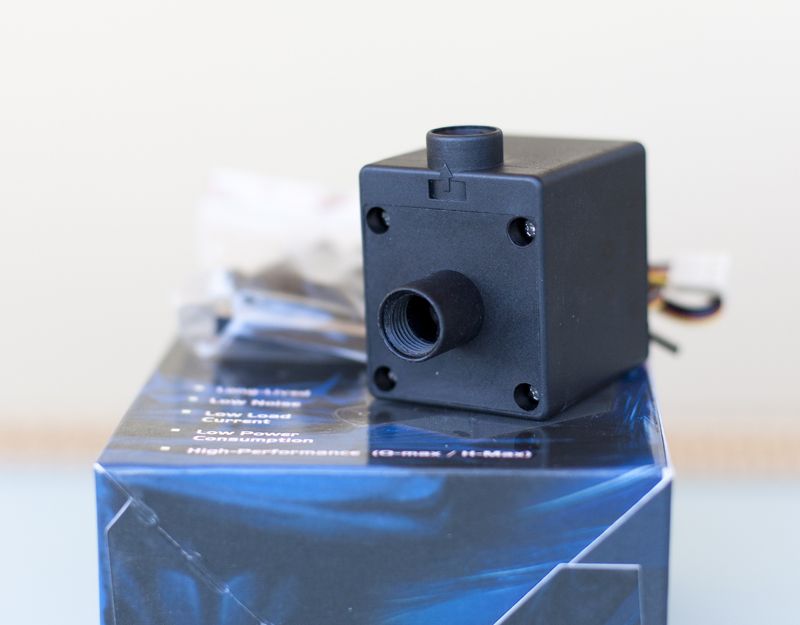
Now, I chose this pump, because of its small dimensions and 17 Db noise output. I gather, it's not a big, full tower PC, so it doesn't need a super powerful pump to keep the coolant flowing.
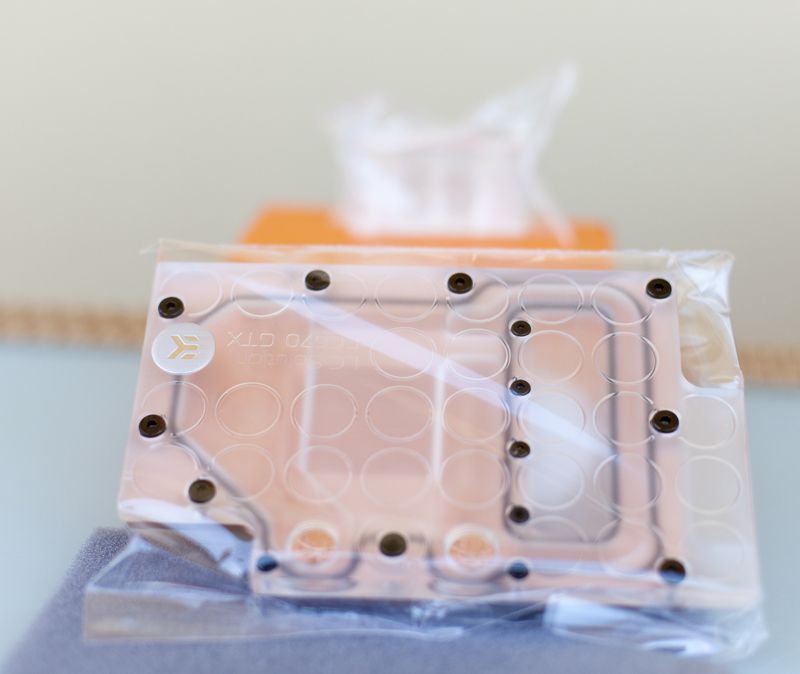
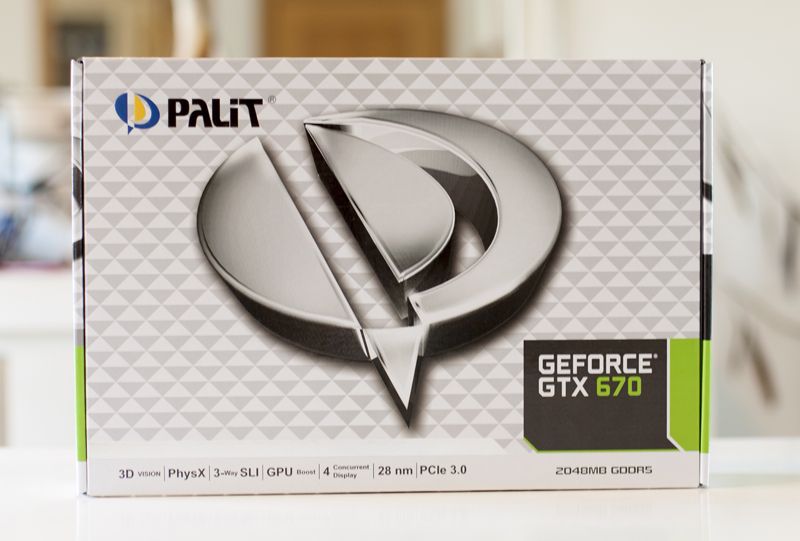
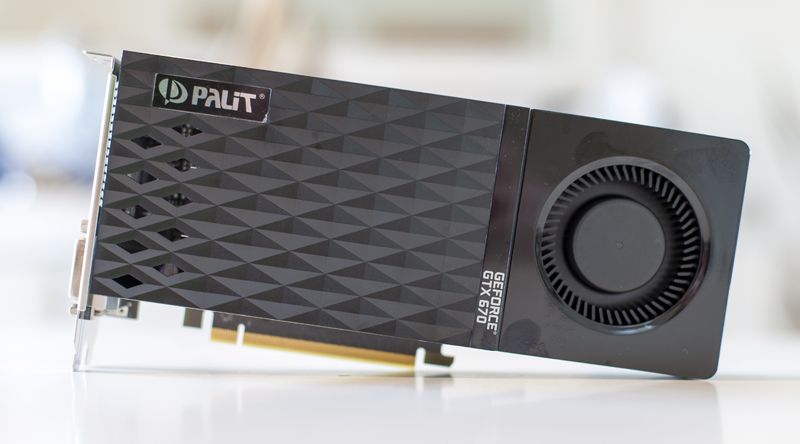
Next, I decided to go for the Nvidia GTX 670 in my build. It will be powerful enough, it's still quite a high-end card, and it will leave some room in the case, once the block is mounted. I decided to go for this block, as it has a transparent front making it perfect for my choice of coolant:
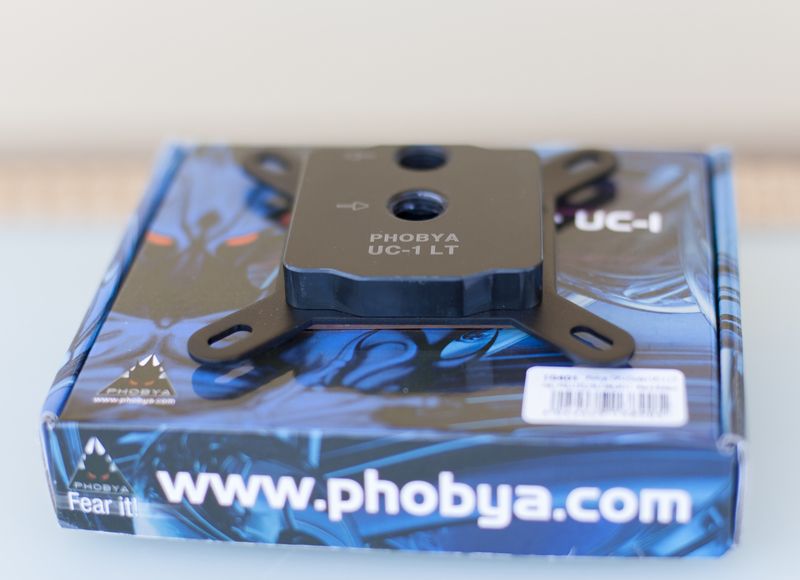
As for the CPU block I went for one that has great reviews. In fact it seems to be one of the most efficient CPU blocks on the market now. I decided not to go for the transparent cover as it will be right behind the GPU, and therefore out of sight. Might as well go for the performance part.
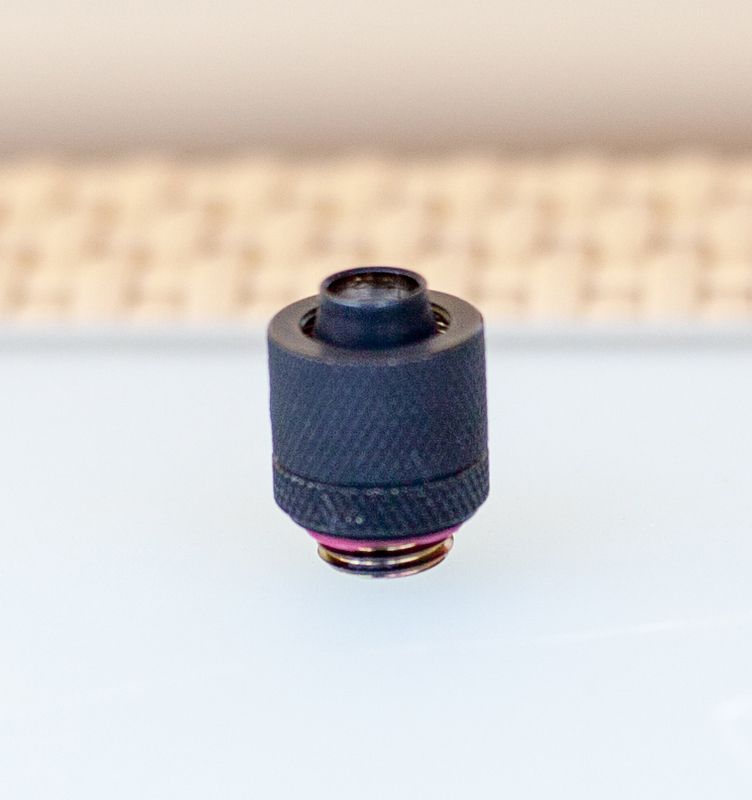
I got whole bunch of these babies (straight, 30 degrees and 45 degrees, revolvable):
And finally, here is the coolant I chose for the system:

As for todays work, this is what I've done so far. I will be ordering PC parts soon and will then mount the CPU and GPU block.

Any thoughts?
Now, I chose this pump, because of its small dimensions and 17 Db noise output. I gather, it's not a big, full tower PC, so it doesn't need a super powerful pump to keep the coolant flowing.
Next, I decided to go for the Nvidia GTX 670 in my build. It will be powerful enough, it's still quite a high-end card, and it will leave some room in the case, once the block is mounted. I decided to go for this block, as it has a transparent front making it perfect for my choice of coolant:
As for the CPU block I went for one that has great reviews. In fact it seems to be one of the most efficient CPU blocks on the market now. I decided not to go for the transparent cover as it will be right behind the GPU, and therefore out of sight. Might as well go for the performance part.
I got whole bunch of these babies (straight, 30 degrees and 45 degrees, revolvable):
And finally, here is the coolant I chose for the system:
As for todays work, this is what I've done so far. I will be ordering PC parts soon and will then mount the CPU and GPU block.
Any thoughts?
mr.doom
Member
Next batch of parts came in today. I had no time to work with them all yet, but here are some pictures of new components that arrived:
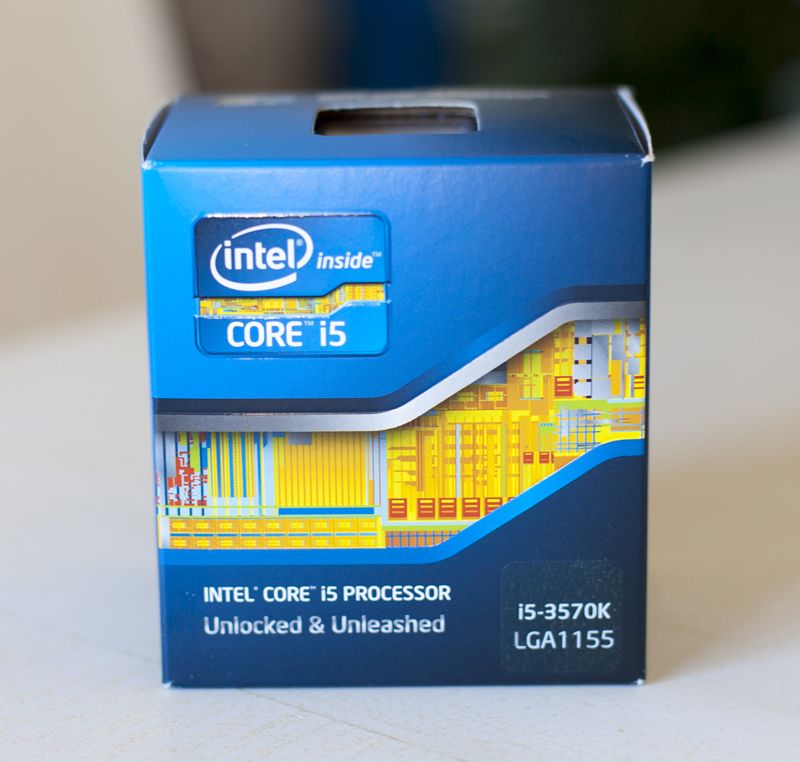
First of all is the CPU. I decided to go for the Intel i5 3570K, instead of i7 3770K. From the reviews I read, it seems that 3570K is much better overclocker, and that with the right overclock, you can almost match its performance to the 3770K. I decided to be persuaded and bought one:
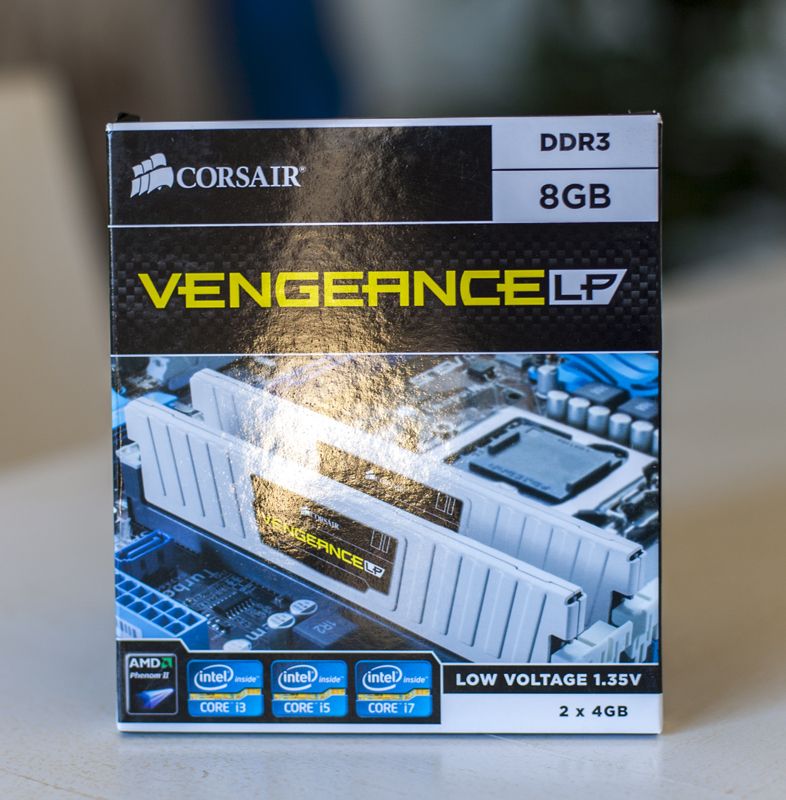
As for the RAM, I went for the Corsairs' Vengeance 8GB Low Profile, in white. Not that easy to get hold of them, but I got them anyway")
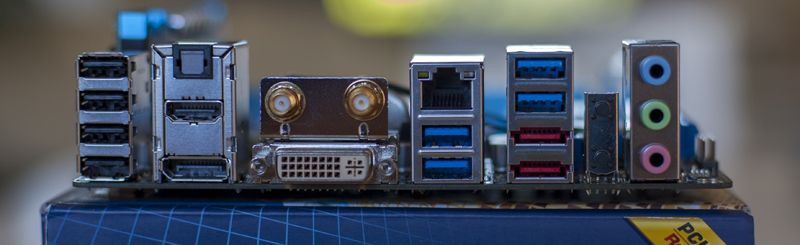
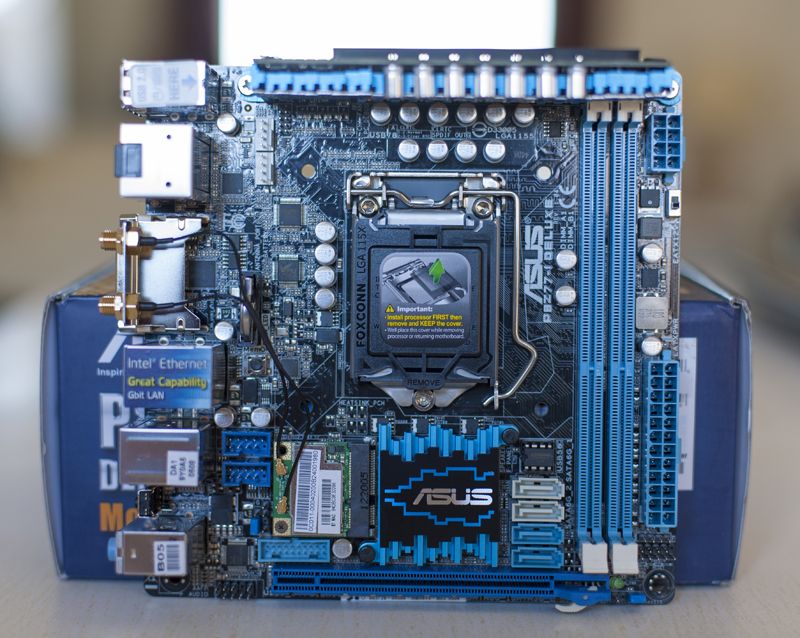
Thirdly, is the motherboard. After reading, and watching many reviews, I am convinced, that there is no other motherboard currently on the market that could match this little beast:

Here is the motherboard in a bit more detail:
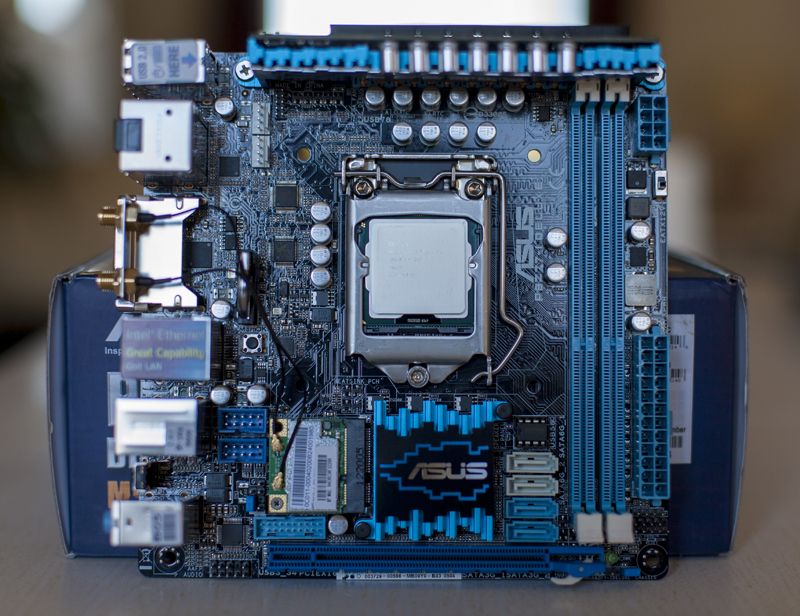
Here, with the CPU ready in place:
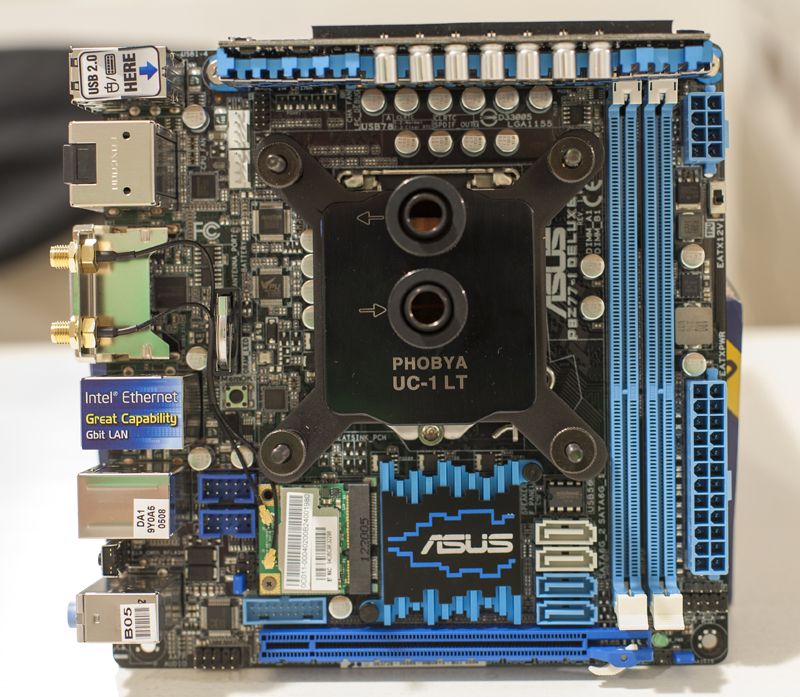
After I've done that, there was a little party I needed to attend but I still managed to fit the CPU block
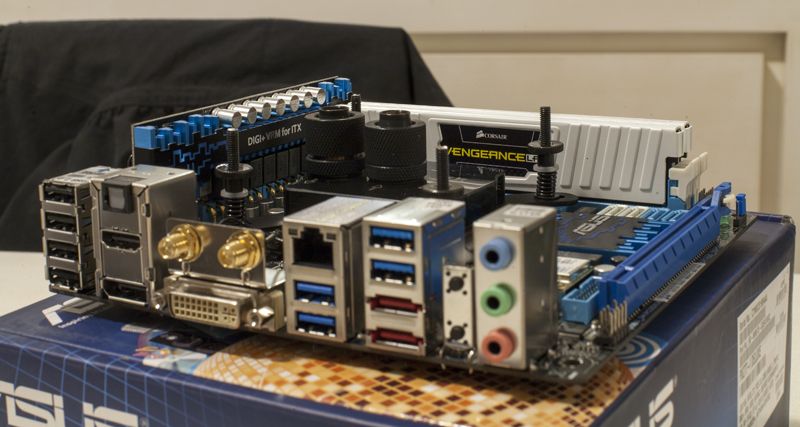
and the RAM, after I came back:
Now, off to bed, and tomorrow I will be mounting it all in the case.
First of all is the CPU. I decided to go for the Intel i5 3570K, instead of i7 3770K. From the reviews I read, it seems that 3570K is much better overclocker, and that with the right overclock, you can almost match its performance to the 3770K. I decided to be persuaded and bought one:
As for the RAM, I went for the Corsairs' Vengeance 8GB Low Profile, in white. Not that easy to get hold of them, but I got them anyway
Thirdly, is the motherboard. After reading, and watching many reviews, I am convinced, that there is no other motherboard currently on the market that could match this little beast:
Here is the motherboard in a bit more detail:
Here, with the CPU ready in place:
After I've done that, there was a little party I needed to attend but I still managed to fit the CPU block
and the RAM, after I came back:
Now, off to bed, and tomorrow I will be mounting it all in the case.
claptonman
New Member
Looks sweet, can't wait to see it finished!
mr.doom
Member
Looks sweet, can't wait to see it finished!
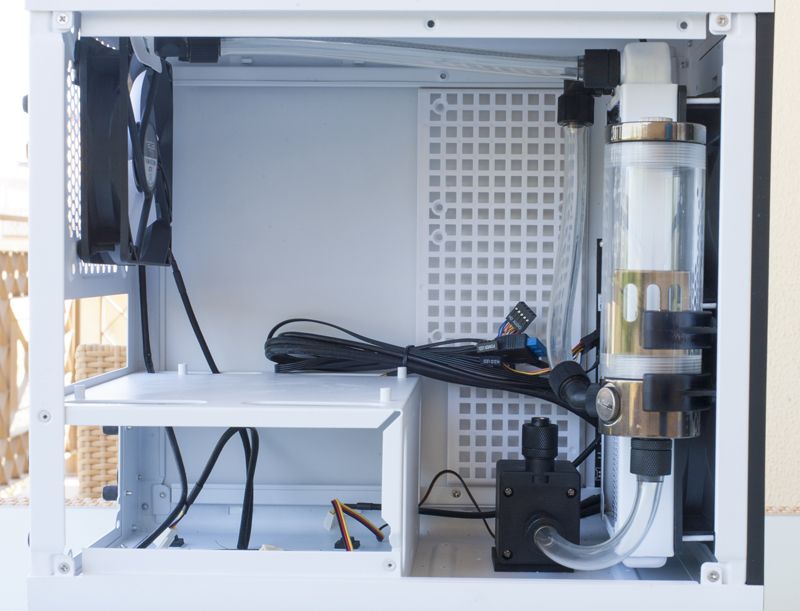
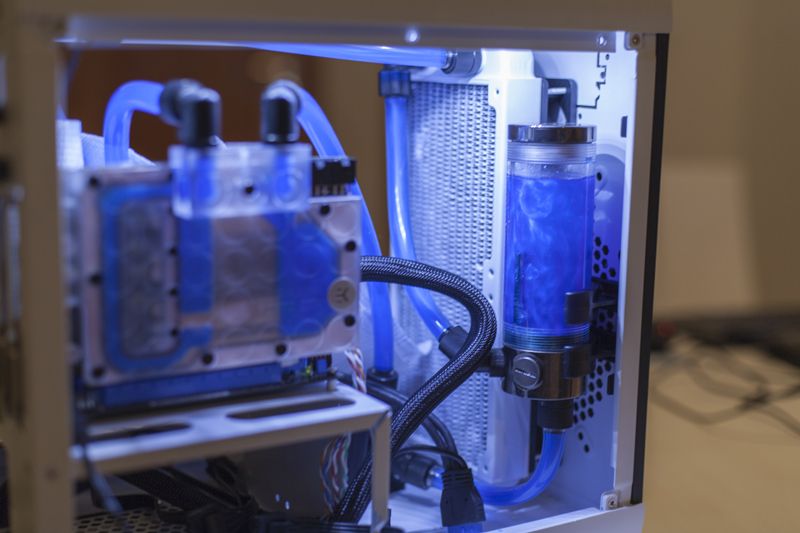
Thanks! I can't wait too. This is why I decided to think through my plan, and to see the PC working asap, I decided to close the loop for now. I will add the GPU as the very last component, but I do want this PC up and running before.
So I've installed the motherboard and closed the loop:
and then I connected the side panel cables:
I have to figure out if there is any other way I can route these cables so they don't ruin the simple and pristine look I'm going for... Any ideas?
mr.doom
Member
Well, I forgot to buy molex to 3-pin connectors... Doh! Need to wait till tomorrow to run the whole computer, as i will overheat without the running fans. But the computer is now tested for leaks, and there are none.
Here's a little teaser of the things to come
Since I have some problems embedding the video, I'll just give you a link:
http://www.youtube.com/watch?v=R5mGNB3WEeU&hd=1
Here's a little teaser of the things to come
Since I have some problems embedding the video, I'll just give you a link:
http://www.youtube.com/watch?v=R5mGNB3WEeU&hd=1
mr.doom
Member
Ever thought about same LED's behind the resivoir? might look nice.
Thanks. Such a nice idea! I'm getting extra ones now, so I can put it up
jonnyp11
Active Member
Thanks. Such a nice idea! I'm getting extra ones now, so I can put it up
would be awesome to get some sort of defuser soyou can't see the individual little dots of light but a bar instead of they don't come that way but should look cool no matter what. i'd get plain white for that and blue for the rest if you plan to put them on the case too (sounded sort'a like that)
jonnyp11
Active Member
Thanks. Such a nice idea! I'm getting extra ones now, so I can put it up
would be awesome to get some sort of defuser so you can't see the individual little dots of light but a bar instead of they don't come that way but should look cool no matter what. i'd get plain white for that and blue for the rest if you plan to put them on the case too (sounded sort'a like that)
mr.doom
Member
would be awesome to get some sort of defuser so you can't see the individual little dots of light but a bar instead of they don't come that way but should look cool no matter what. i'd get plain white for that and blue for the rest if you plan to put them on the case too (sounded sort'a like that)
Just bought 3 additional stripes, so that I can place them properly. But definitely a perfect idea to put one behind the reservoir. Got a 12cm strip for it so it shouldn't extend too much from the top of the reservoir (as to say, it should be well hidden behind it).
mr.doom
Member
Sorry for a little delay, I've been so busy with work recently.
Here are some photos of the latest parts I got:
And a teaser of the system in testing (for those who missed the video in a previous posts):
I'm going to give this system some proper shoot, now that it's almost complete and post the pictures soon.
Since I'm struggling with placing the window on the side panel (just don't seem to have enough skill with the Dremel I suppose), I wanted to know if any of you know a company I could send the side panel to and would do it for me?
Thanks for any advice.
jonnyp11
Active Member
http://www.kustompcs.co.uk/acatalog/info_9704.html
if u in the uk, may be able to convince them to ship US but would be expensive.
if u in the uk, may be able to convince them to ship US but would be expensive.
gigabiteme
New Member
try this if u can't find someone to cut it for u
equip- jigsaw/fine blade(metal) thinnest blade you can find- 1/2 thick plywood/and some clamps- trace your cut on panel, clamp panel to pylwood
so it is tight on wood with no air gaps<-willreduce vibration) with dremel you
have cut a hole in center of cut out- make sure you go all the way thru the wood too-start cutting with saw in the hole you made to the edge of your
trace mark and follow it very slowly,make sure you are cutting the wood too. you shud make some practice runs with a piece of metal similar with same properties. opps forgot to mention your project looks great.
mr.doom
Member
http://www.kustompcs.co.uk/acatalog/info_9704.html
if u in the uk, may be able to convince them to ship US but would be expensive.
try this if u can't find someone to cut it for u
equip- jigsaw/fine blade(metal) thinnest blade you can find- 1/2 thick plywood/and some clamps- trace your cut on panel, clamp panel to pylwood
so it is tight on wood with no air gaps<-willreduce vibration) with dremel you
have cut a hole in center of cut out- make sure you go all the way thru the wood too-start cutting with saw in the hole you made to the edge of your
trace mark and follow it very slowly,make sure you are cutting the wood too. you shud make some practice runs with a piece of metal similar with same properties. opps forgot to mention your project looks great.
Thanks guys. I'll give Kustom PC's a go, but they need to do it to my specifications. The whole is already there. They just need to even it out and cut the acrylic into it. And not just bolt it on with screws, I want this to be mounted with rubber molding.
mr.doom
Member
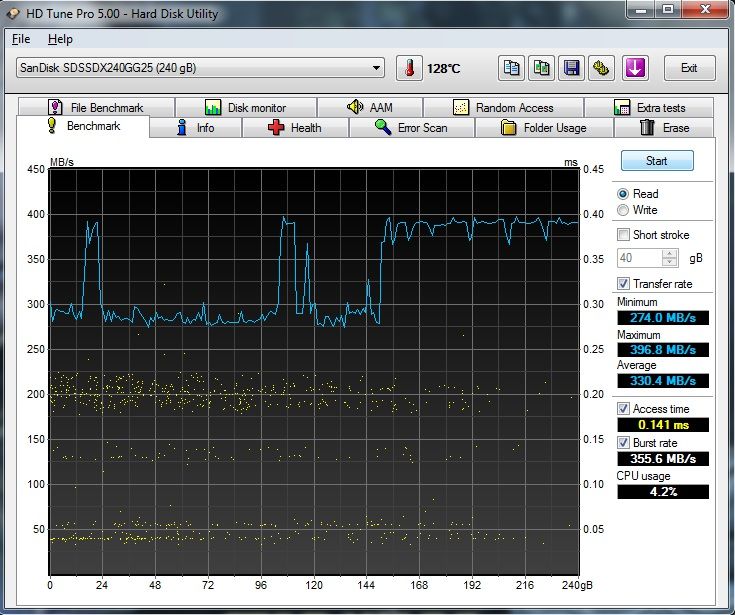
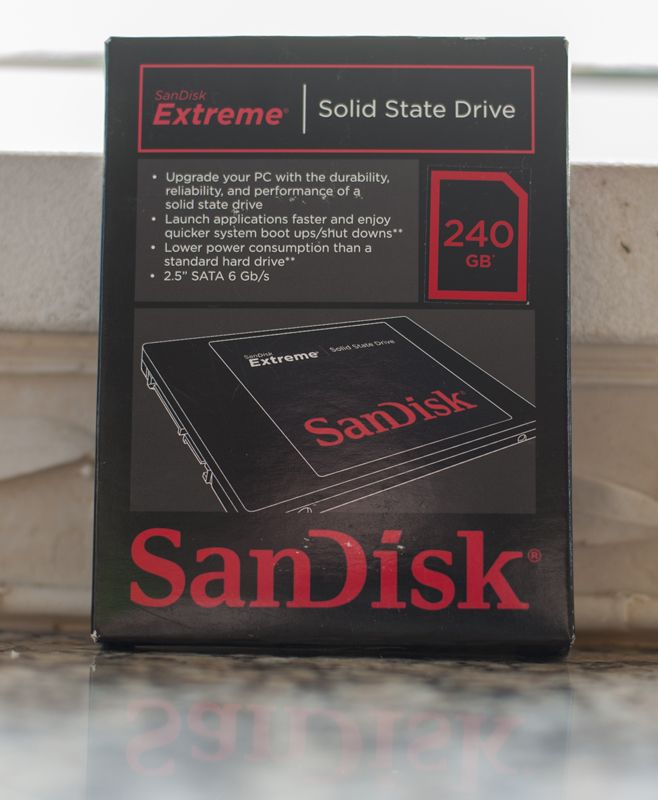
Great choice on the SSD. Used several and liked them all, using a 120GB Extreme now!
Thanks. This is one piece of the SSD. Very, very quick. I was surprised about how quick it really is.
I'll be posting more benchmark results later on tonight, but here's one to show how quick the SSD is.